JL
JurisLit
Support

Knowledge base

Step-by-step help for the JurisLit suite — from your first sign-in, through discovery and review, to presenting in court.

Getting started

Your JurisLit account, the free trial, and downloads.

Getting Started with JurisLit

5 articles
How do I start a free 14-day JurisLit trial?

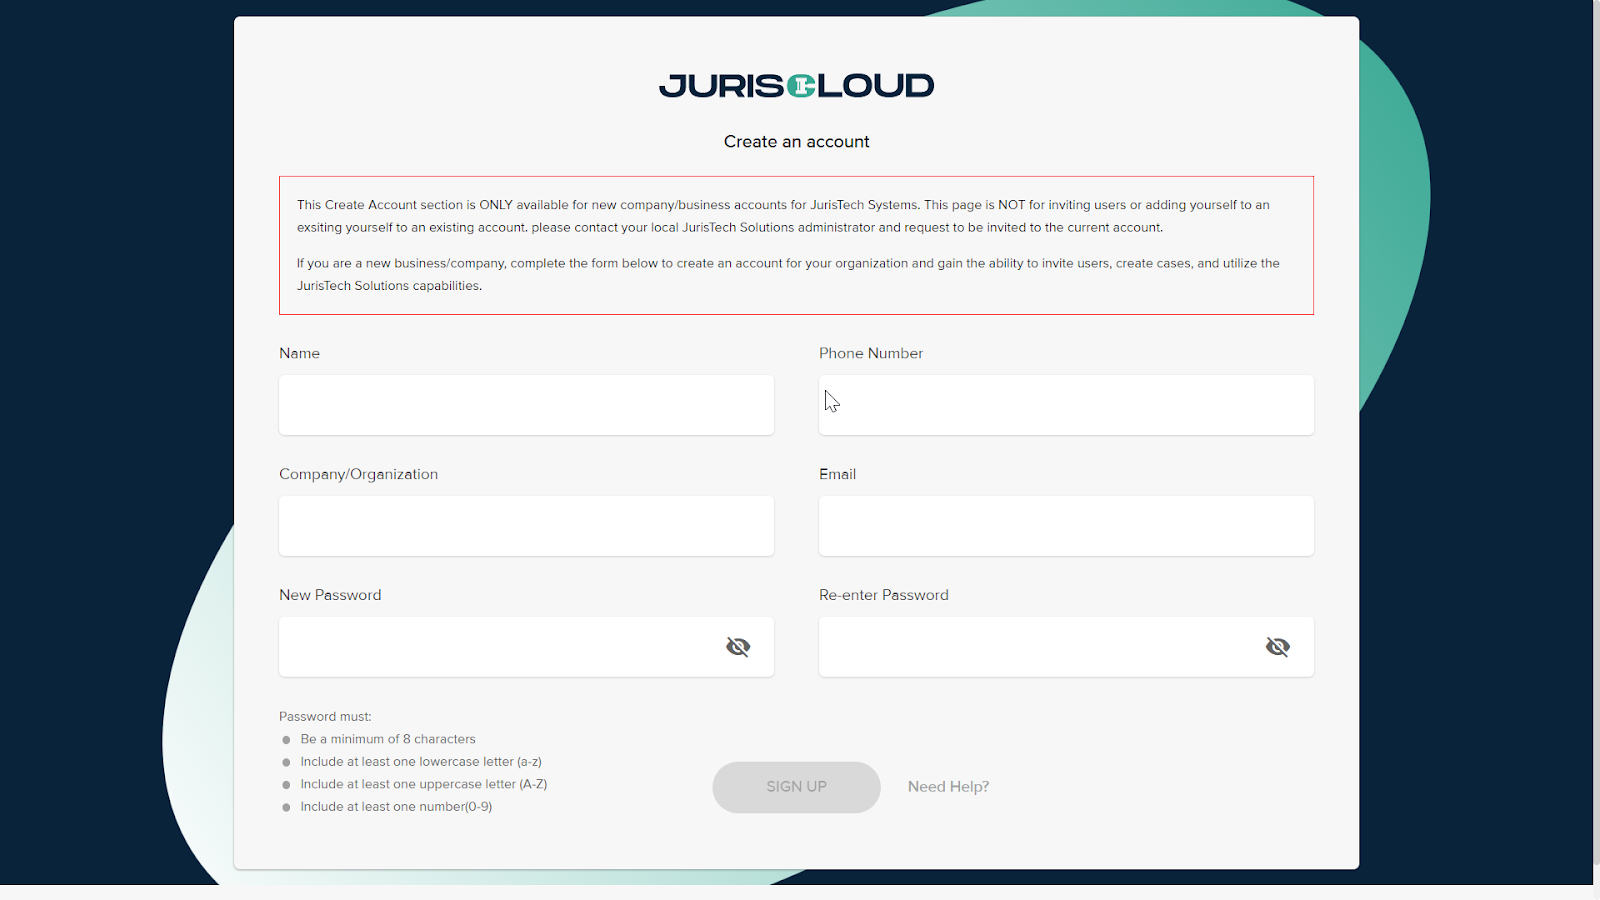
You can open a JurisLit account for your firm yourself, with no credit card. The free trial lasts 14 days, and you become the account owner, so you can add your team and create cases straight away.

STEP 1

Open the sign-up page

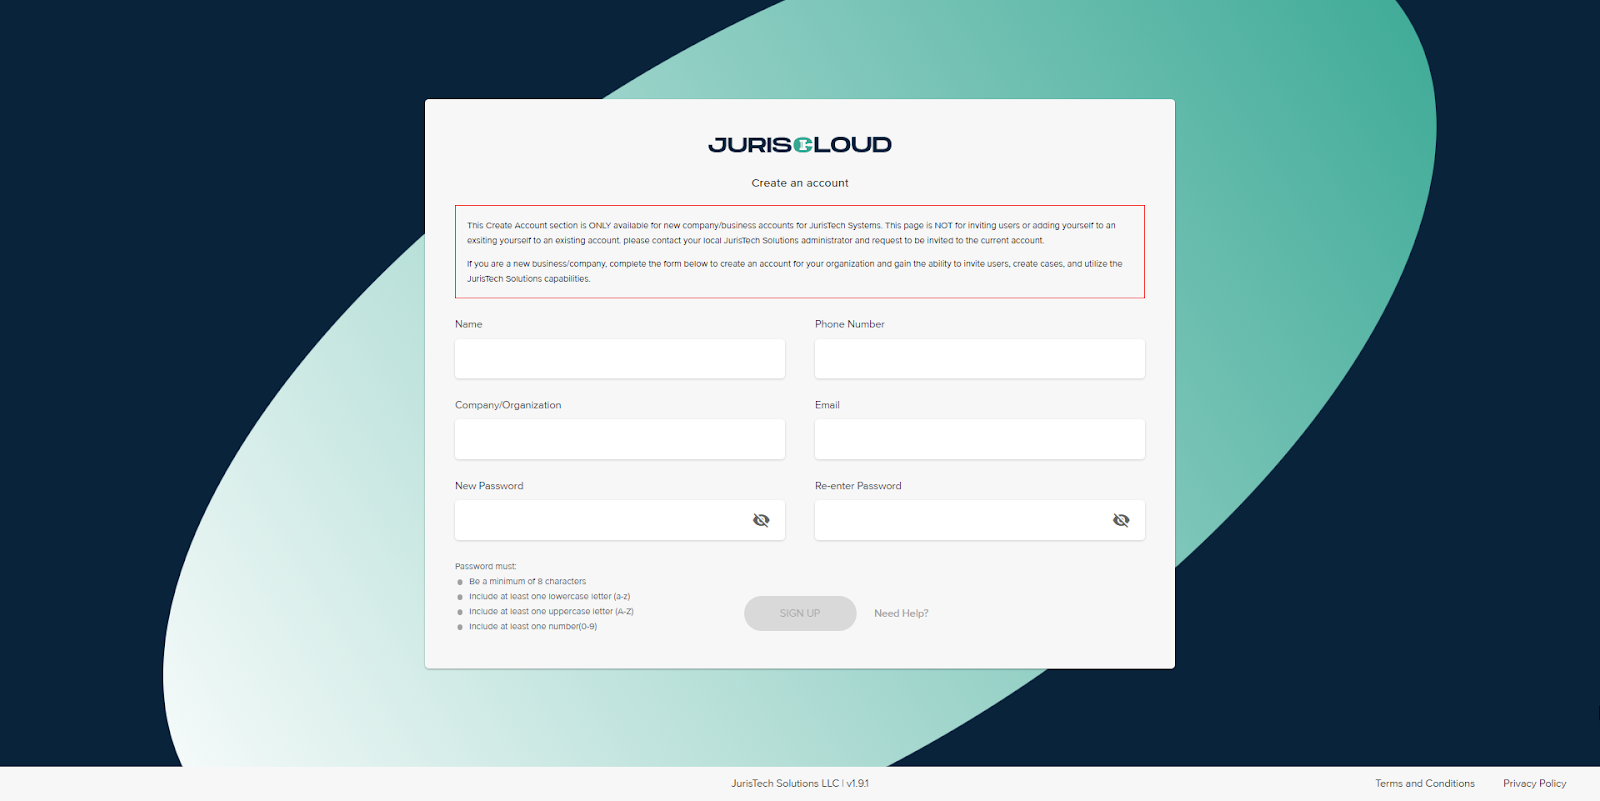
On the JurisLit home page, click Start your free 14-day trial. If you're on the sign-in page, click Create your firm's account — free 14-day trial instead.

STEP 2

Enter your firm and choose a trial

Type your firm's name in Firm / organization name. Under Start your free 14-day trial, choose the package to try, JurisCloud + JurisTrial or JurisValidator. For pricing, email info@islandlegaltech.com.

JurisDiscovery, JurisReview and on-premise installs are set up with our team. They show a Contact sales link and can't be started as a self-service trial.

STEP 3

Create your owner login

Fill in Your name, Email, Username and Password (8+ characters). Use an email address you can get to, because account messages are sent there.

STEP 4

Create the account

If a security check appears, complete it. Then click Create account. Creating an account means you agree to the Terms of Service and Privacy Policy.

STEP 5

Note your firm code and license key

The confirmation shows your firm code and your firm's license key. The whole firm shares one license key, so keep both somewhere safe. After a few seconds you're taken to the sign-in page. Sign in with the username and password you just chose.

Tip: If you see Self-service signup is not enabled on this server, your firm uses a private JurisLit install. Contact Island Legal Technologies and we'll open the account for you.
What's included in the free trial, and what happens when it ends?

What the trial includes

  • 14 days of the package you chose when you signed up, for example JurisCloud with JurisTrial. No credit card is needed.
  • A firm account with you as owner, plus your firm's license key.
  • Two ready-made permission groups for your firm, Case Admins and Reviewers, each shown with your firm's short prefix in front. You're added to Case Admins, so you can add users, build groups and create cases in JurisAdmin.
  • The Windows downloads your plan covers, such as JurisTrial Desktop and JurisValidator, on the JurisLit home screen.

Keeping track of your trial

During the trial, the JurisLit home screen shows a banner such as Free trial — 9 days left. If you manage the account, the banner also has a View subscription link.

When the trial ends

  • The product doors close, and the home screen shows Your free trial has ended.
  • Nothing is deleted. Your cases, documents, users, groups and settings are all kept, and subscribing picks up exactly where you left off.
  • To subscribe, contact Island Legal Technologies. We set up subscriptions with you directly; you can't pay by card in the app yet.

If the home screen says Your subscription is not active instead, your firm's access is paused but your data is safe. Contact Island Legal Technologies to turn it back on.

How do I sign in to JurisLit?
STEP 1

Go to the sign-in page

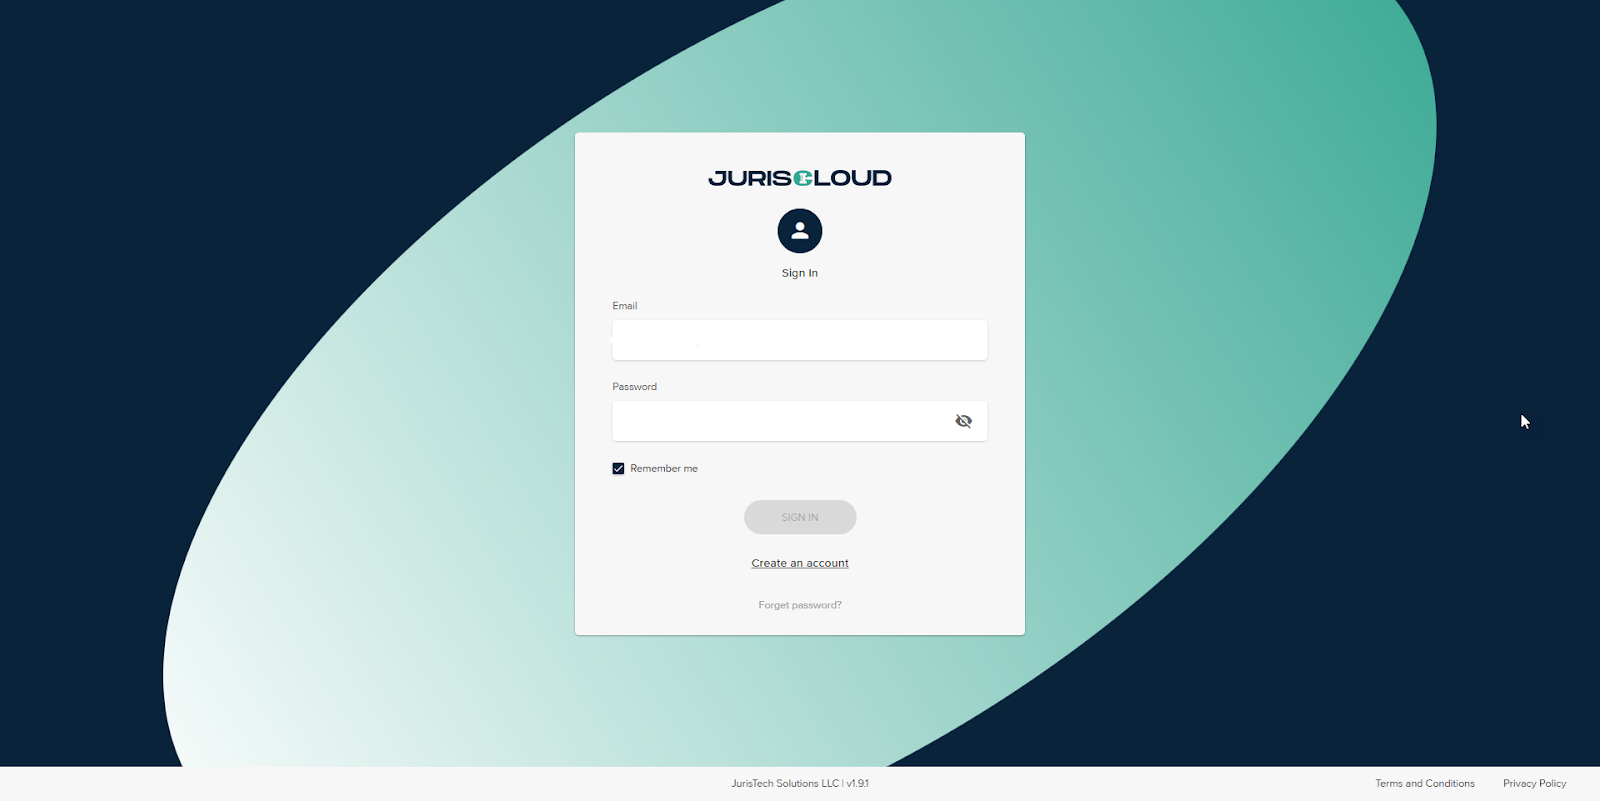
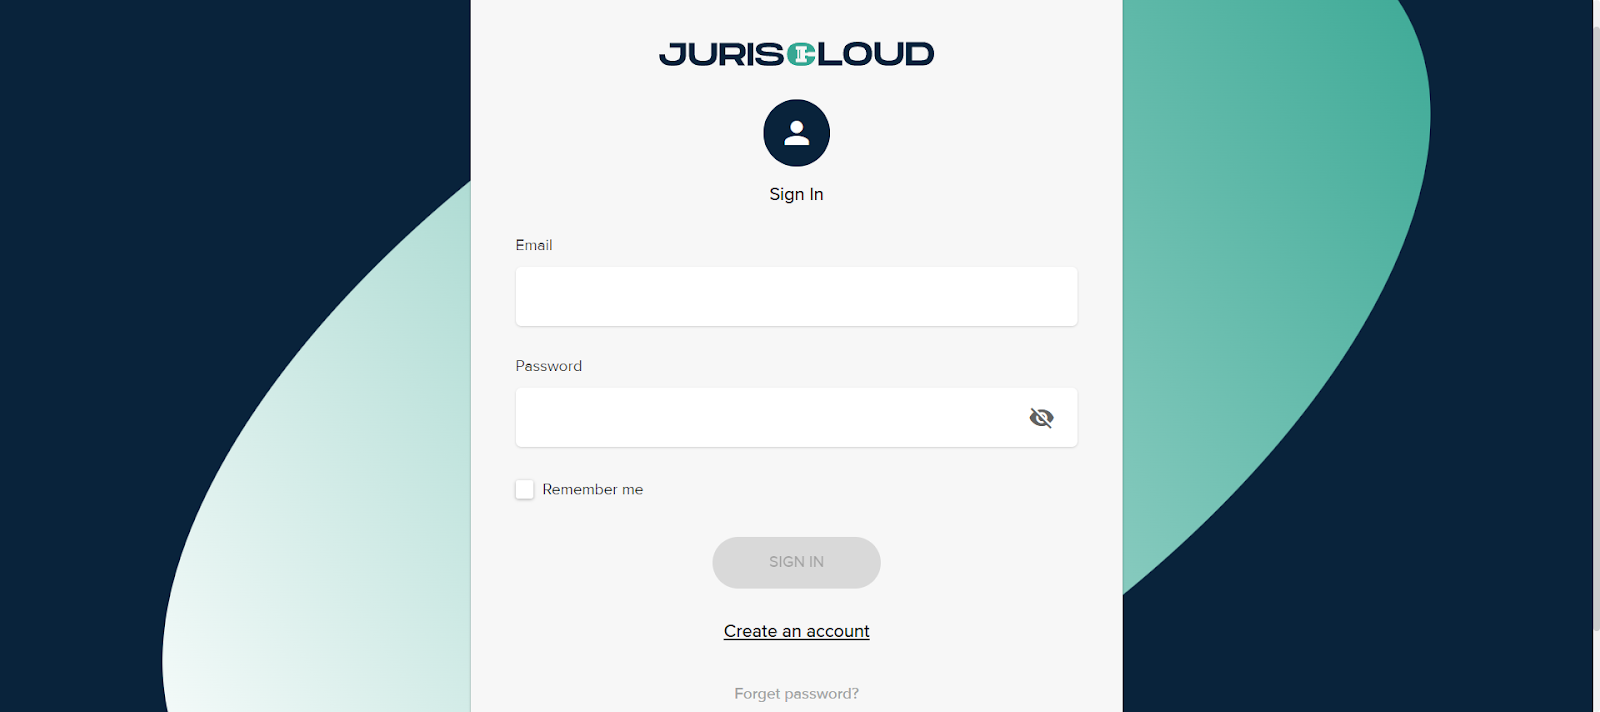
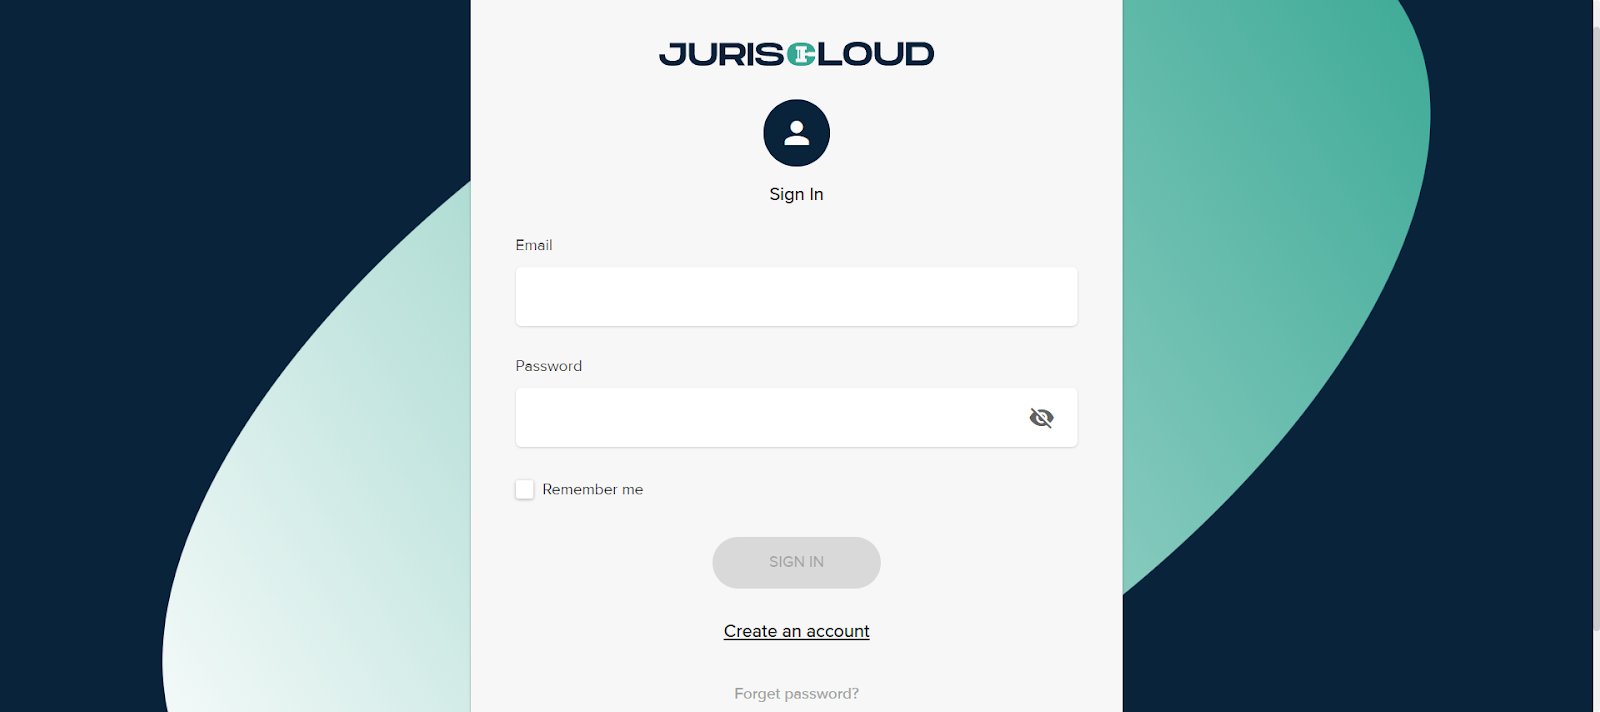
On the JurisLit home page, click Sign in at the top right. If you've signed in on this computer before, you may be taken straight to the sign-in page.

STEP 2

Enter your details

Type your Username and Password, then click Sign In.

STEP 3

Enter your authentication code (if asked)

If your login uses two-factor authentication, an Authentication code box appears. Enter the 6-digit code from your authenticator app and click Sign In again.

After you sign in, the JurisLit home screen shows the products you can use.

Already signed in? The Sign in button on the JurisLit home page changes to Open JurisLit →. Click it to go straight in.

Lost your phone? If you can't get a code, ask your firm administrator to reset two-factor authentication for your login. You can then sign in with just your password and set it up again.

I forgot my password. How do I get back in?

Your firm administrator can set a new password for you in JurisAdmin.

STEP 1

Contact your firm administrator

Ask whoever manages JurisLit at your firm to reset your password. This is usually the account owner or a member of your firm's Case Admins group.

STEP 2

Your administrator sets a new password

They open the Users tab in JurisAdmin, find your login, click Reset PW, and send you the new password securely.

STEP 3

Sign in with the new password

Sign in with your username and the new password.

Are you the account owner? If you're the only administrator and you're locked out, contact Island Legal Technologies for help.

Right password, but still can't sign in? Your login may have been turned off. Ask your administrator to check that the Active box is ticked for you on the Users tab.

How do I find my way around the JurisLit home screen?

After you sign in, the JurisLit home screen shows a card, or "door", for each product your login can use. You only see the doors your permission group covers.

  • JurisCloud (Case Preparation): opens your cases in the browser so you can stage exhibits, transcripts and trial documents.
  • JurisTrial (Trial Presentation): the Windows courtroom presentation app. Click Download JurisTrial to install it.
  • JurisValidator (Production QC): a Windows app for checking production volumes. Click Download JurisValidator to install it.
  • JurisAdmin (Administration): for administrators only. Manage users, permission groups, cases and case access here.
  • If your firm is licensed for them, you may also see JurisDiscovery and JurisReview.

If your login covers only one product, JurisLit skips this screen and opens that product for you.
Getting back here: click the blue square logo at the top left of any product or of JurisAdmin.

Signing out: click Logout on the home screen or in a product's top bar. In JurisAdmin, click Sign out.

Seeing a message instead of doors?

  • No product access on your login: your firm's subscription is active, but you haven't been given a seat. Ask your firm administrator.
  • Your free trial has ended or Your subscription is not active: see the article about what happens when a trial ends.

Found a problem? Click the bug icon at the top right of any JurisLit page to send us a report.

Downloads

2 articles
How do I download JurisTrial Desktop or JurisValidator?

JurisTrial Desktop (courtroom presentation) and JurisValidator (production volume checks) are Windows programs that you install on your own computer. Both come with a JurisLit account, including the free trial, and you need to be signed in to download them.

You'll need: Windows 10 or Windows 11 (64-bit).

STEP 1

Sign in to JurisLit

Sign in with your JurisLit username and password.

STEP 2

Find the download

On the JurisLit home screen, find the JurisTrial or JurisValidator card and click Download JurisTrial or Download JurisValidator. The file size is shown on the button. The Downloads section of the JurisLit home page has Download buttons too.

STEP 3

Save and run the installer

Save the file (JurisTrial-Desktop-Setup.exe or JurisValidator-Setup.exe) and double-click it to install. Windows may show a SmartScreen warning the first time; the next article explains how to continue.

No Download button?

  • Sign up to download: you're not signed in. Sign in, or start a free trial.
  • Not in your plan: your login doesn't include this product. JurisTrial Desktop needs JurisCloud / JurisTrial access, and JurisValidator needs permission to view productions. Your firm administrator can grant these.
  • coming soon or Not yet available: this installer hasn't been posted yet. Contact us and we'll tell you when it's ready.
  • No card for the product on your home screen: your permission group doesn't cover it.

JurisValidator runs entirely on your computer. Nothing is uploaded, and it works without an internet connection.

Windows says "Windows protected your PC" when I run the installer. What do I do?

Our installers aren't code-signed yet, so Windows SmartScreen shows a warning the first time you run one. This is expected for the JurisTrial Desktop and JurisValidator installers you download from your JurisLit account.

STEP 1

Run the installer

Double-click the installer you downloaded. A blue Windows protected your PC window appears.

STEP 2

Click More info

Click More info below the message. The app details appear.

STEP 3

Click Run anyway

Click Run anyway. The installer starts, and you can follow its steps as usual.

You only need to do this the first time you run each installer. Code signing is in progress, and the warning will go away once it's done.

Only do this for files you downloaded from your own JurisLit account. If you're not sure where a file came from, don't run it; download it again from the JurisLit home screen.

If there's no Run anyway button because your company blocks unsigned programs, ask your IT team to allow the installer.

JurisDiscovery

Processing, search, analytics, and productions.

JurisDiscovery

19 articles
How do I open a case and find my way around JurisDiscovery?

JurisDiscovery runs in your web browser (or in the JurisDiscovery desktop app). Everything happens on one screen: a header bar across the top, a rail of tabs down the left side, the document grid in the middle and the document viewer on the right.

STEP 1

Open a case

  1. Sign in and choose JurisDiscovery.
  2. On the Select a Case screen, click the matter you want to work on.
  3. To switch cases later, click the case name in the header bar and pick another case from the list.

If you don't see any cases, ask your administrator to create the case or give you access to it.

STEP 2

Get to know the left rail

Click a tab in the left rail to open its panel. Click the same tab again to close it.

  • DISCOVER: bring data into the case (loose files, PST email, productions and chat) and check processing status.
  • SCOPE: the Chart dashboard and the communications Map, Timeline, Key Terms and Key Concepts.
  • EXPLORE: the document grid with Folders, Search and Bulk Operations.
  • BATCH (review coordinators) or REVIEW (reviewers): review batches.
  • PRODUCE: build productions with Bates numbering.
  • FILE: assemble court filings.
  • TRANSCRIPTS: import and work with deposition transcripts.
  • NAVIGATE AI: case briefs and AI tools.
  • ADMIN: case settings and managers. Only administrators see this tab.

Which tabs you see depends on the permissions your administrator has given you.

STEP 3

Work with the grid and viewer

  • Click a row in the grid to open that document in the Document Viewer. Use Prev and Next to move through the list.
  • Switch the viewer between Metadata, Native, Text, Viewer (the rendered pages) and Production (the Bates-stamped version, once a document has been produced).
  • Click Coding below the viewer to open the coding panel.
  • Use Hide Grid and Hide Viewer in the header bar to give the other side more room.
  • To jump straight to a record, type its DocID or Bates number in the Go to DocID or Bates no… box above the grid and click Go.

Tip: Click Help in the header bar at any time to open the built-in guide.

How do I process loose files and PST email into a case?

Use the DISCOVER tab to bring native data into your case. JurisDiscovery extracts the metadata and text, pulls out attachments, removes duplicates and adds everything to the document grid.

Process loose files

  1. Click DISCOVER in the left rail, then click Process Loose Files.
  2. Optionally type a Custodian. It is applied to every file in this batch.
  3. Drag files or folders onto the Drag files or folders here area, or click the area (or the Process button) to choose files. You don't need to zip them first.
  4. The files upload and process straight into the case. Password-protected .zip or .7z archives can be unlocked with Archive passwords.

In the desktop app, open Advanced: add individual files / folder, click Select Files or Select Folder, then click Start Processing.

Every file type is taken: email files, Office documents, PDF, images, audio, video and archives. Only system clutter, such as Thumbs.db and desktop.ini, is left out.

Process a PST

  1. Click DISCOVER, then click Process PST.
  2. Step 1: choose one or more PST files (click Browse, or Process PST if nothing has been staged yet).
  3. Step 2: optionally set the custodian, the person whose mailbox this is.
  4. Step 3: click Process PST. A progress bar shows each phase. You can Pause or Cancel, or click Minimize and keep working while it runs.

Choose your settings

Open Settings in either dialog before you start to adjust how the data is processed:

  • Deduplicate on family level: choose Global (across all custodians) to keep one copy of each document in the case, or By Custodian to keep each custodian's own copy.
  • Choose whether to extract attachments and body text, and (for PST) whether to Include deleted items.
  • Pick a Date Format: ISO, US or EU.
  • Extraction Fields lets you choose which metadata fields are captured.

When processing finishes, the new documents appear in the grid and in the EXPLORE folder tree under their processing session.

How do I import a production or load file I received?

When the other side sends you a production, use Process Productions on the DISCOVER tab. You can import a volume that has load files, a production of stamped PDFs with no load file, or corrections to records you already have.

Import a volume with a load file

  1. Click DISCOVER in the left rail, then click Process Productions.
  2. Under Import Load File, click Choose Folder and select the production folder that holds the .DAT and .OPT files.
  3. Review the field mapping, then click Import. The import creates a new session in the case.

Import a production that has no load file

  1. Under Import Loose File Production, click Choose Files & Import.
  2. Select the produced PDFs. JurisDiscovery imports them and reads the Bates numbers stamped on the pages into the ProdBeg, ProdEnd and ProdRange fields, along with any confidentiality designation.

Correct or update existing records

  1. Under Overlay Individual Files, click Browse .DAT and/or Browse .OPT.
  2. Click Overlay. Records are matched by DocID across all sessions.

Tip: To overlay a delimited file onto records you have selected in the grid, use EXPLORE > Bulk Operations > Overlay. Load the file, click Preview File, choose the key field to match on, map the fields and click Apply Overlay to Selected Records.

How do I import chat data such as Slack or iMessage?

Process Chat imports chat conversations and splits them into one document per conversation per calendar day, so each day can be reviewed, coded and produced like any other document.

STEP 1

Set what counts as a day

  1. Click DISCOVER in the left rail, then click Process Chat.
  2. Under 1 · What counts as a day, type the time zone the case should use (for example, America/Los_Angeles) and click Save.

You must set the time zone before you can import. Changing it later does not re-cut days that were already imported.

STEP 2

Choose the chat export

Under 2 · The chat export, choose the file to upload. Supported sources are a zipped Slack export, an iMessage chat.db database, ChatGPT or Claude data exports, and RSMF files. JurisDiscovery works out the format from the contents.

If a folder holds several exports, they are listed under Exports found with the custodian taken from each folder name. Check the custodians, then click Import all checked.

STEP 3

Add the custodian and names, then import

  1. Under 3 · Custodian and names (optional), type the custodian.
  2. For iMessage, you can map phone numbers and email handles to names, one per line (for example, +15551234567 = Asha Patel). Anything you don't map shows as the raw handle.
  3. Click Import chat.

Tip: To add AI summaries to imported chat days, use NAVIGATE AI > Summarise Chat…. You approve a cost estimate before it runs.

How do I check processing progress and fix processing errors?

The DISCOVER tab has three tools for keeping an eye on your data before and after processing.

Take an inventory before you process

  1. Click DISCOVER, then Inventory.
  2. Click Browse... to pick a folder, then click Scan Directory. You see how many files there are, their total size and how many are supported.
  3. If each subfolder belongs to one person, tick Make checked folders custodians so each folder name becomes the custodian for everything beneath it. You can edit any value.
  4. Select the files you want and click Stage. The next time you open Process Loose Files or Process PST, the staged files are ready to process.
  5. Click Export Report to save the inventory.

Watch processing progress

Click DISCOVER > Status. The Status window shows files processed, documents, emails, attachments, loose documents, load file records, errors and duplicates skipped. You can drag it out of the way by its title bar while you keep working.

Reprocess files that failed

  1. Click DISCOVER > Reprocess Errors. JurisDiscovery scans the case for files that did not process.
  2. Tick the files to retry, or click Select All.
  3. Click Reprocess Selected.

Tip: Scanned documents often come through with no text. To make them searchable, go to EXPLORE > Bulk Operations > OCR and click Show OCR Candidates, then run OCR on them.

How do I search for documents?

Searches run from the Search panel, which opens above the grid so you can see your query and the results together.

STEP 1

Open Search

  1. Click EXPLORE in the left rail.
  2. Click the magnifying-glass (Search) icon at the top of the panel. The Search panel opens on the Search tab.
STEP 2

Choose where to search

Search Within is set to All Records. Click it to limit the search to part of the case instead.

STEP 3

Build your query

You can type straight into the Search Query box (keywords, or conditions such as From CONTAINS "Holloway"), or build conditions without typing:

  1. Under Build a Condition, choose AND, OR or NOT.
  2. Click Select field... and pick a field. Type in the box at the top of the list to find it quickly.
  3. Choose how to match. Most fields offer Contains, Equals, Begins With, Is Null and Is Not Null. Date fields offer Begin (on or after), End (on or before) and Between. Body text offers proximity options such as Within 5 words.
  4. Enter the value and click Add. The condition is added to the Search Query box.
  5. Use the ( and ) buttons to group conditions.

Tick Search across languages to also search the other languages found in the case.

STEP 4

Choose how results are shown

  • Sort Results By: pick up to three sort fields, each Ascending or Descending.
  • Display Fields: leave it on Keep current columns, or tick the fields you want. Type a name and click Save View to keep that set of fields as a grid view.
STEP 5

Run the search

Click Search. Results load in the grid below, and you can adjust the search and run it again at any time. Click Clear All to start over.

Reuse and save searches

  • Pick one of your last searches from Recent Searches.
  • To keep a search, type a name in Name the Search and click Save.
How do I use saved searches, combine searches and run a search term report?

The Advanced Search and Search Reports tabs of the Search panel help you manage saved searches and measure how many documents your terms hit. Open them from EXPLORE > Search icon.

Load or save a search

  1. Click the Advanced Search tab.
  2. To reuse a search, pick it from -- Saved Searches -- and click Load. Then click Search.
  3. To save the current query, type a name in Search name..., choose a folder (or leave it at the top level) and click Save. Use Save As to save a copy under a new name.

Combine saved searches

  1. Under Combine Searches, use + Insert search… to add saved searches to the expression.
  2. Join them with AND, OR or AND NOT, and group them with ( and ). For example: ("Hot Docs" OR "Privileged") AND NOT "Spam".
  3. Click Run. The combined results load in the grid.

Search Groups lets you collect saved searches and run them together, and Search History lists the searches you have run.

Run a search term report

  1. Click the Search Reports tab.
  2. Leave Report on -- New Report -- and type a Report Name.
  3. Enter your Terms, one per line. You can use AND/OR and the * wildcard (for example, confiden*). Click Load CSV/TXT to bring in a list from a file.
  4. Under Scope, choose All Records or Folder. Use Narrow by to add field conditions, and Result Fields to choose the columns in the report.
  5. Click Validate to check the terms, then click Run to see the hits for each term.
  6. Click Export CSV to save the results, and Save to keep the report for later.
How do I filter the grid and save a grid view?

The document grid can be filtered, grouped and laid out the way you like. You can save a column layout as a grid view to use again.

Filter by column

  1. Click Filter on the toolbar above the grid. A row of Filter... boxes appears under the column headings.
  2. Type in a box to narrow the grid. The count of matching records is shown on the toolbar.
  3. Click Clear Filters to remove all column filters.

Group documents

Drag a column heading into the Group By: bar above the grid, or double-click the heading. Add more headings to group on several levels.

Filter by date

  1. Click Timeline on the toolbar to show the Document Timeline.
  2. Choose By Day, By Month, By Quarter or By Year.
  3. Click a bar to show only documents from that period. Click Clear Filter to remove it, or Hide to close the timeline.

Choose, change and save a grid view

  1. Pick a view from the Grid View: list on the toolbar, such as -- Default --, EM View (email columns) or LD View (loose document columns). Saved views appear in the list too.
  2. Right-click any column heading to open the field list. Tick fields to show them and clear ticks to hide them. Type in Filter fields... to find a field. Drag column headings left or right to reorder them.
  3. Click Save on the toolbar (or Save Grid View in the right-click menu) to update the current view, or Save As (Save As New View) to save it under a new name.
  4. Click Set as Default View in the right-click menu to make it the view that opens first.
  5. To undo your changes to a built-in view, click Reset.

Tip: Selecting records works the usual way: tick the checkbox on each row, or tick the box in the header row to select everything shown. Click Clear Selection to start again.

How do I tag documents, file them in folders and update many at once?

Start by selecting the documents in the grid with their checkboxes. The Action menu on the grid toolbar shows how many are selected.

Tag documents

  1. Open the Action menu and point to Tag Selected.
  2. Click a tag to apply it, or click + Create New Tag... to make a new one and apply it straight away.
  3. To take a tag off, use Action > Remove Tag.

Click Action > Manage Tags… to see all tags. Click a tag's name to show only documents with that tag, or Show All to clear the filter. The + and - buttons apply the tag to, or remove it from, the selected documents.

File documents in folders

  1. Choose Action > Copy to Folder.
  2. Tick the destination folder, or click + New Folder to create one.
  3. Click Copy. The documents stay where they were and are also added to the folder.

Open EXPLORE and click a folder in the folder tree to show its documents. Use Action > Remove from Folder to take selected documents back out of a folder.

Update a field on many documents

  1. Click EXPLORE, then the lightning-bolt (Bulk Operations) icon.
  2. Open Update. Choose the Field and type or pick the Value.
  3. Choose an Action: Update Selected, Append to Existing, Make Empty or Auto-Number (numbers the records in the current grid order using a prefix, padding and start number you set).
  4. Tick Apply to whole thread (inclusive) if you also want to update every email in the same conversations.
  5. Click Apply.
How do I code documents?

You code documents in the Coding panel below the document viewer. The fields you see come from the coding panel layout chosen for your case.

STEP 1

Open a document and the Coding panel

  1. Click a document in the grid to open it in the viewer.
  2. Click Coding below the viewer to expand the panel.
  3. If your case has more than one layout, pick one from the drop-down in the Coding panel heading.
STEP 2

Fill in the fields

Choose values from the lists or type in the text fields. Your changes save automatically, including when you move to another document.

STEP 3

Move through your documents

Use the arrow buttons in the Coding panel heading to go to the previous or next record without leaving the panel.

Time-saving options

  • Copy from previous (the clipboard button in the heading) copies the coding from the document you viewed last.
  • Apply to family applies your coding changes to the document's parent and attachments too.
  • The thread button in the heading applies this coding to every email in the conversation and their attachments. Run the threading analysis first (see How do I work with email threads?).
  • Related shows the document's family (the parent email and its attachments).
  • Reset clears the changes you have made to the current document.

Note: Documents that have been locked (for example, after a production) do not accept coding changes until an authorized user unlocks them.

How do I work with email threads and find the most inclusive emails?

Email threading groups emails into conversations and flags the inclusive emails: the latest messages that already contain the earlier replies. Reviewing only inclusive emails can save a lot of time.

Show only inclusive emails

  1. Open EXPLORE and search or filter the grid to the emails you want.
  2. Click Inclusive only on the grid toolbar. JurisDiscovery analyses the set, adds an Inclusive column and filters the grid to the most complete email in each thread.
  3. Click Inclusive only again to turn the filter off.

See thread statistics

  1. Click SCOPE in the left rail, then Map.
  2. Click Threading. You see the number of threads and inclusive emails, and a list of the largest threads with their Emails, Inclusive count and Date range.
  3. Click Open beside a thread to load it into the grid, or click Open … inclusive in Grid to load all the inclusive emails.

See a single email's conversation

When you view an email, the bar above the viewer shows a coloured dot and a label such as 4 in conversation. Latest means the email is inclusive. Click the label to see the conversation tree.

Code a whole thread

  • In the Coding panel, click the thread button in the heading to apply the current coding to every email in the conversation and their attachments.
  • In Bulk Operations > Update, tick Apply to whole thread (inclusive).
  • Use Action > Apply review → Threads + Attachments for the selected records.

Note: Threading relies on the conversation information in the email headers. Mail that didn't come from Outlook or Exchange may show No conversation id.

How do I use the Chart, communications Map, Timeline, Key Terms and Key Concepts?

The SCOPE tab gives you a visual overview of the case so you can decide where to focus. Anything you pick here can be opened in the grid.

The Chart dashboard

  1. Click SCOPE in the left rail. The Chart dashboard shows counts by Custodians, Document Types, Languages and Processed Sessions.
  2. Click any row, such as a custodian or document type, to open the grid filtered to those documents.

Opening the Chart clears any search or filters on the grid, so the counts always show the whole case.

The communications Map

  1. On the SCOPE screen, click Map. The map shows who communicated with whom. Click Refresh to build it from the current grid, or All Records to build it from the whole case.
  2. Use the Top parties slider and Min msgs to control how many people and connections are shown.
  3. Click parties to select them (or click Select all), then click Open selected in Grid to see the records involving them. Click Clear to start again.

Timeline

Click Timeline to see the Timeline Wheel, with documents arranged by date. Scroll over the wheel (or drag the Periods slider) to zoom in time, and click a spoke to filter the grid to that date range.

Key Terms and Key Concepts

  • Key Terms lists the most-used words across the records (common words are left out). Click terms to pull their records into the grid.
  • Key Concepts lists the main topics found in the documents. Click one to pull its documents into the grid.
  • To search by concept, type in the Concept search… box and click Concept. Tick no keyword to find related documents that don't contain the word you typed.

Concept search and Key Concepts run on your case data without AI and at no cost.

Languages

Choose the case's main language in this matter is in, then click Languages. Each document's language is identified and documents in other languages are labelled in the Language column so you can filter them.

How do I redact documents?

You draw redactions on the document in the viewer. They are saved automatically and burned into the page images when the document is produced.

STEP 1

Open the document

Click the document in the grid. If needed, click Viewer at the top of the viewer to show the rendered pages. The Markup: toolbar appears above the page.

STEP 2

Choose the redaction style and label

  • Pick Black Box / White Text or White Box / Black Text.
  • Pick a label to print in the box: No Label, REDACTED, PRIVILEGED, CONFIDENTIAL, ATTORNEY-CLIENT, WORK PRODUCT, PERSONAL or Custom....
STEP 3

Draw the redaction

  1. Click Redact.
  2. Drag a box over the content you want to hide.
  3. Click Redact again to turn the tool off.
STEP 4

Check your work

  • Peek makes redactions see-through so you can check what's underneath.
  • Undo removes your last markup, and Clear removes all markups from the document.
  • The same toolbar has Highlight, Text and Draw tools with a colour picker for other annotations.

How redactions are produced

  • When a redacted document is produced, the redactions are burned into the images and the native file is withheld, so the unredacted original is never sent.
  • If you need a redacted copy outside a production (for example, as an exhibit), select the documents and choose Action > Burn Redactions…. This creates a new record with the redactions burned in, while the original keeps its editable redactions.
How do I create a production with Bates numbers?

Click PRODUCE in the left rail to open the Production window. It walks you through ten numbered sections. Your choices can be saved as a profile and reused.

STEP 1

Define Production

Under 1. Define Production, choose which records to include: Checked Records, By Folder, By Saved Search or By Tag. You can also start from Clone from existing production….

STEP 2

Set the production output

  • Type a Production Name, or tick Name this production after the Bates prefix.
  • Choose the Image Format: Multi-page PDF (default) or Single Page TIFF.
  • Under File Naming, tick Same as Bates Number to name each file by its Bates number, or set a file prefix and suffix.
STEP 3

Set the sort order

Under 3. Sort Order for Bates Assignment, choose up to three fields (each Asc or Desc) that decide the order numbers are assigned in.

STEP 4

Set up Bates numbering

  • Choose the Numbering Level: Page level (number per page) or Document level (one number per document).
  • Enter the Prefix (for example, ABC-), Start #, number of Digits and an optional Suffix. Check the Preview.
STEP 5

Add endorsements

Under 5. Document Endorsements, choose the font, size and colour, then set what prints in each position (Top-Left through Bot-Right). Type static text, or choose Bates Number or a field value. By default the Bates number prints bottom right.

STEP 6

Choose what to produce

  • 6. Files to Produce: images, text, natives and chat (RSMF).
  • 7. Native File Options: for spreadsheets, presentations, documents and custom extensions, choose Image Only, Native Only, Native + Image or Native + Placeholder.
  • 8. Placeholder Sheet Design: how slip sheets for natives look.
  • 9. Load File Fields & Order: choose and order the load file fields, and set Aliases for field names.
STEP 7

Validate and generate

  1. Click Validate Before Production to check the set against your Validation Rules… (for example, catching privileged documents).
  2. Tick Lock produced documents if produced documents should stop accepting coding and redaction changes.
  3. Click Create Production. The volume is built with DATA, IMAGE, NATIVE and TEXT folders, including the DAT and OPT load files.

Deliver the production

  • Pick the production from the list and click Zip (you can add an optional ZIP password) or Export to Folder.
  • Click DAT File to export a load file, or Report for a production report.
  • To see a produced document, open it and click Production at the top of the viewer.

Tip: Under Production Profiles, type a name and click Save to keep your settings. Next time, choose the profile and click Load.

How do I export documents and data?

There are several ways to get data out of JurisDiscovery, depending on what you need. None of these create a production. To produce documents with Bates numbers, see How do I create a production with Bates numbers?

Export the grid to a spreadsheet

  1. Arrange the grid columns you want (see How do I filter the grid and save a grid view?).
  2. Tick the records to export. If none are ticked, all results are exported.
  3. Click Export CSV in the header bar.

Export files

  1. Select the records in the grid.
  2. Choose Action > Export Files….
  3. Under Include, tick PDF, Text and/or Native.
  4. Under Name files by, choose DocID, Original filename, BegBates, ArtifactID or any field, and add an optional prefix.
  5. Choose whether to group files into PDF, TEXT and NATIVE subfolders, include attachments of the selected records, or write to the case repository instead of downloading a ZIP.
  6. Click Preview to check, then Export.

Other quick exports on the Action menu

  • Download Natives: download the original files for the selected records.
  • Export Combined PDF: combine the selected documents into one PDF.
  • Print to PDF: print the selected documents.

Tip: Search term report results can be exported with Export CSV on the Search Reports tab.

How do I set up review batches and review a batch?

Review batches split a set of documents into manageable chunks for your review team. Review coordinators (administrators) set them up on the BATCH tab. Reviewers pick up work on the REVIEW tab.

For coordinators: create batches

  1. Search or filter the grid to the documents to review, or tick the ones you want.
  2. Click BATCH in the left rail to open the Batch Manager, and make sure the Batches view is selected.
  3. Optionally add review stages under Workflow Stages (for example, First Pass and QC). Type a name in New stage name and add it.
  4. Under Create Batches, set the Source (All in current grid filter or Checked records only).
  5. Choose the Mode: Pre-split into fixed batches, or Self-assign pool (reviewers pull N) so reviewers take the next set themselves.
  6. Set the Size and a name Prefix.
  7. Leave Keep conversations whole ticked so an email thread is never split between two reviewers. Batch sizes will vary a little.
  8. Under Assign to, choose the review stage the new batches start in, then click Create batches.

For coordinators: assign and track batches

  • Each batch shows its progress (documents with a Review Status out of the total).
  • Use the drop-downs under a batch to change its stage or assign it to a reviewer. Click Auto-distribute to spread unassigned batches across reviewers.
  • Tick several batches to Assign them to a stage or Delete them together. Deleting a batch does not delete its documents.
  • Click a batch name to open it in the grid. Click Reviewer view to see what reviewers see.

For reviewers: review a batch

  1. Click REVIEW in the left rail. Under Select a batch to review, your batches are listed first.
  2. Click Review on a batch, or click Get next on a self-assign pool to take the next set of documents.
  3. The batch loads in the grid. Work through it with the Coding panel. Set the Review Status on each document so your progress is counted.
  4. Come back to the REVIEW tab to see your progress or pick another batch. Click Re-open to go back to a finished batch.
How do I make documents available to reviewers in JurisReview?

Documents you process in JurisDiscovery are hidden from JurisReview until you release them. This lets you cull and search the data first and send only the documents that need review.

Release selected documents

  1. Search or filter the grid and tick the documents to release.
  2. Choose Action > Publish to Review, and confirm.

Release a folder or a whole search result

  1. Click EXPLORE, then the lightning-bolt (Bulk Operations) icon, and open Publish to JurisReview.
  2. Choose what to release:
    • Make Viewable in JurisReview: the selected records.
    • Make Folder Viewable: every record in the folder selected in the folder tree. Tick Include subfolders to include them too.
    • Promote All Matching: every record matching the current search and filters, not just the page on screen.
  3. Confirm when asked.

To take documents back out of JurisReview, use the matching Hide from JurisReview, Hide Folder from JurisReview or Hide All Matching button.

Note: You need administrator rights or the publish-to-review permission to do this. It is available on cloud-hosted cases. It isn't available in the desktop app.

How do I import and work with deposition transcripts?

The TRANSCRIPTS tab lets you load deposition transcripts, search them, add notes and tag testimony by issue.

STEP 1

Import transcripts

  1. Click TRANSCRIPTS in the left rail.
  2. Click Import Transcript Files and choose one or more .txt transcript files, or click Import from Folder to load a whole folder.
  3. The transcripts appear under Loaded Transcripts. Click one to open it with its page and line numbers.
STEP 2

Search

Type in Search in Transcripts to find words across your transcripts. Click a result to jump to that page and line. Use Search Notes to search the notes you have added.

STEP 3

Add notes

Select some text in the transcript to add a note to that passage, then click Save Note. You can also click the note button on any line (it shows Add note when you hover). Lines with notes are highlighted.

STEP 4

Tag testimony by issue

  1. Under Issue Tags on the TRANSCRIPTS panel, type a tag name and click + Add. Create one tag for each issue or topic.
  2. In the transcript, click the small box at the left of a line to choose issue tags for it. Right-click a tagged line's marker to remove a tag.
  3. For speed, click a line and press a number key (1 to 9, then 0) to toggle your first ten issue tags on that line.
How do I get a case brief or ask questions about my case with Navigate AI?

The NAVIGATE AI tab gathers the tools that summarise and answer questions about your case.

Get a Case Brief

  1. Click NAVIGATE AI in the left rail.
  2. Under Case Brief, click Whole case to brief everything, or Current results to brief exactly what the grid is showing (your active search or filter).
  3. The report opens in a window where you can print or export it.

The Case Brief is built from your data without an AI model, so it uses no AI tokens.

Build the Case Knowledge Base

  1. Under Case Knowledge Base, click Build / Update Knowledge Base.
  2. Review the cost estimate and approve it. AI reads and indexes your documents. You can click Stop at any time.
  3. Run it again after adding new documents to bring the knowledge base up to date.

Ask Juris a question

  1. Under Ask Juris About Case, type your question, for example What did the witness say about the contract?
  2. Click Ask Case. The answer opens in a window showing how many relevant documents were found and analysed.

Tip: Ask Juris answers by meaning using the knowledge base and uses AI tokens. For instant concept searching with no AI and no cost, use Key Concepts on the SCOPE > Map screen.

JurisReview

Browser-based document review.

JurisReview

9 articles
How do I open a case and find my way around JurisReview?

JurisReview runs in your web browser. Once you are signed in, everything happens on one screen: a case picker along the top, a strip of tabs down the left side, the document grid in the middle, and the document viewer on the right.

STEP 1

Choose your case

  1. Open the case drop-down at the top of the screen, next to the home button.
  2. Pick the case you want to review. If the list says No cases available, ask your review administrator to give you access to the case.
STEP 2

Look over the case summary

JurisReview first opens on the Chart tab. It shows a quick summary of the case, including Total Documents, Custodians, Sessions and Productions.

STEP 3

Open the document grid

Click Open Grid at the top right of the Chart page, or click the Review tab on the left. The document grid appears and the Review panel opens beside it.

What's on the screen

  • Tabs on the left: Chart (case summary), Review (folders, search, tags and bulk tools) and Transcripts. Administrators also see an Admin tab.
  • Review panel: has four sub-tabs: Folders, Search, Tags and Bulk. Click the active tab again to close the panel. You can also use the arrow button on the panel's edge to collapse or expand it.
  • Document grid: one row per document. The footer shows how many documents are Reviewed, Pending and the Total.
  • Document Viewer: opens on the right when you click a document. The Coding panel is part of the viewer.

Signing out

Click Logout in the top right corner when you're done. If you have unsaved coding changes, your browser warns you before you leave the page.

How do I sort, filter, group and select documents in the grid?

The document grid lists every document in the current case, or in the folder or search you've selected. Here's how to arrange it.

Sort by a column

Click a column heading to sort by that column. Click it again to switch between ascending and descending. An arrow in the heading shows the current sort.

Filter by column values

  1. Click Filter on the toolbar above the grid. A row of Filter... boxes appears under the column headings.
  2. Type in any box. The grid narrows as you type.
  3. Click Filter again to hide the filter row.

Group documents

  1. Drag a column heading into the Group By bar above the grid, or double-click the heading.
  2. Add more headings to group by more than one column. They're numbered in the order they apply.
  3. Click a group chip to switch its direction. Double-click a chip to remove it.

Filter by date with the timeline

  1. Click Timeline on the toolbar to show the Document Timeline chart.
  2. Choose By Day, By Month, By Quarter or By Year.
  3. Click a bar to show only documents from that period. A banner shows the active date filter. Click Clear Date Filter (or Clear Filter) to remove it.

Show attachments

Click Expand All to include attachments with their parent documents. Click Collapse All to hide them again.

Load more documents

Choose how many rows to load with the page-size selector in the grid footer: 100, 250, 500, 1000 or All. More rows load as you scroll down. Click Retrieve All on the toolbar to load everything at once.

Select documents

  • Tick the checkbox at the start of a row to select it.
  • Tick one row, then hold Shift and tick another to select every row in between.
  • Use the checkbox in the header row to select or clear all rows.

You can use selected documents with the Tags and Bulk tools, or drag them onto a folder.

Resize columns

Drag the right edge of a column heading to make it wider or narrower.

How do I choose or save a grid view (column layout)?

A grid view is a saved set of grid columns. JurisReview comes with several ready-made views, and you can save your own for the case.

STEP 1

Pick a view

Open the Grid View: drop-down on the toolbar above the grid and choose a view:

  • -- Default --: the standard set of columns
  • EM View: email columns such as From, To, CC, Subject and Date Sent
  • LD View: loose-document columns
  • LF View: fields from load files
  • Production View: production columns such as Bates begin and end, and volume
  • Transcript View: the transcript file name only

Views that have been saved for the case appear at the bottom of the list.

STEP 2

Show or hide columns

  1. Right-click any column heading in the grid. The Toggle Columns menu opens.
  2. Type in Filter fields... to find a field quickly.
  3. Tick a field to show it as a column. Clear the tick to hide it. The grid updates right away.
STEP 3

Save the layout

  • Click Save As New at the bottom of the Toggle Columns menu and type a name to save the layout as a new view. Spaces and special characters in the name become underscores. The new view is added to the Grid View: list and selected.
  • Click Save Grid View to save your changes to the custom view you have selected.

To close the menu without saving, press Esc or click anywhere outside it.

Tip: Saved views belong to the case, so other reviewers on the case can choose them too. Administrators can also create, update and delete views from Admin > Grid Manager.

How do I search for documents?

Open the Review tab and click the Search sub-tab. You can run a free-form keyword search or build a search on specific fields. The results appear in the document grid.

Free Form Search

  1. Type your words in the Free Form Search box.
  2. Choose where to look:
    • Metadata: document fields such as subject, sender and file name
    • Metadata + Body: fields plus the document text
    • Body Only: the document text only
  3. Click Search or press Enter.
  4. Click Clear to remove the search and show all documents again.

Field Search

  1. Under Field Search, choose a field from Select field...: From, To, Subject, Custodian, DocType, FileType, DateFrom or DateTo.
  2. Choose how to match: Contains, Equals, Begins With, Is Null (the field is empty) or Is Not Null (the field has a value).
  3. Type the value in Search value.... The value box is hidden for Is Null and Is Not Null.
  4. To add another condition, click + Add.
  5. Click Search.

Your conditions appear under Active Filters. Click the × on a filter to remove just that one. Click Clear All to remove every field condition.

Tip: You can also narrow the grid with the column Filter row, the Timeline, or by clicking a folder on the Folders sub-tab.

How do I view a document?

Click any row in the document grid to open that document in the Document Viewer on the right side of the screen.

Switch between views

Use the buttons across the top of the viewer:

  • Metadata: a summary of the document's key fields. Expand All Fields to see every field.
  • Native: the original file. Emails are shown in an email layout, and PDFs, images and Office documents are shown in the viewer.
  • Text: the extracted text of the document.
  • PDF: the PDF version of the document, when one exists.
  • Images: page images brought in with a load file.
  • Production: produced page images with Bates numbers, when the document has been produced.

If a view isn't available for a document, the viewer shows a message explaining why.

Move through documents

  • Click Prev and Next at the top of the viewer to move to the previous or next document in the grid.
  • You can also use the arrow keys when your cursor isn't in a text box.

Work with PDF pages

  • Use Prev and Next on the PDF toolbar to change pages, and - and + to zoom.
  • Click Fit Page to fit the page width, or Fit Window to fit the whole page in the viewer.
  • Click Pages on the left edge of the viewer to show page thumbnails. Click a thumbnail to jump to that page.

Get more room

  • Click the Fullscreen button in the viewer header to fill the screen with the viewer.
  • Click the Open in new window button to open the document in its own browser tab, for example on a second monitor.
  • To download the original file, open a document as a PDF and click Download on the markup toolbar.
How do I code a document?

You code documents in the Coding panel, which is part of the Document Viewer. The fields you see depend on the coding layout set up for your case.

STEP 1

Open the Coding panel

  1. Click a document in the grid to open it in the viewer.
  2. Click the Coding heading at the side of the viewer to expand the panel. Click it again to collapse it.
STEP 2

Choose a coding layout

Pick a layout from the drop-down in the Coding panel heading. Default shows the basic fields (ReviewStatus, Privileged and Confidential). JurisReview remembers the layout you picked for each case.

STEP 3

Fill in the fields

  • Choose an option, pick from a drop-down, or type in a text box, depending on the field.
  • A red asterisk (*) means the field is required.
  • An orange asterisk (*) means the field is required because of another answer. For example, a field may be required once a document is marked privileged.
STEP 4

Save your coding

  • Press Ctrl+S to save. A Saved message appears.
  • Press Ctrl+Enter to save and move to the next document.
  • If you move to another document with Next, Prev, the arrow keys or by clicking a row, your changes are saved automatically.

If a required field is empty, JurisReview won't move on. It highlights the missing fields and shows a Required: message listing them.

Handy shortcuts

  • Copy Previous fills in the values from the last document you saved. This helps when coding a run of similar documents. Press Ctrl+S to save them.
  • Reset puts the fields back to how they were when you opened the document.

To code many documents at once, use the Bulk sub-tab. See How do I tag, file and bulk-update documents?

How do I tag, file and bulk-update documents?

Tags, folders and the Bulk tools let you organize and code many documents at once. First select the documents in the grid with their checkboxes. See How do I sort, filter, group and select documents in the grid?

Create a tag

  1. Open the Review tab and click the Tags sub-tab.
  2. Under Create New Tag, type a tag name and choose a color.
  3. Click +. The tag is added to the list.

Apply a tag

  1. Select one or more documents in the grid. The Tags panel shows how many items are selected.
  2. Click the tag in the list. It's applied to every selected document. If no boxes are ticked, it's applied to the document open in the viewer.

The number next to each tag shows how many documents have it.

Work with folders

  • On the Folders sub-tab, click a folder to show only its documents in the grid.
  • Right-click a folder and choose Add Subfolder, Rename or Delete.
  • To file documents, select them and drag them by their checkbox onto a folder. They're copied into the folder and stay in their original location.

Use the Bulk tools

Click the Bulk sub-tab. The top of the panel shows how many records are selected. Use Select All to select every loaded document, or Clear to clear the selection.

STEP 1

Update a field on many documents

  1. Under 1. Update, choose a Field.
  2. Type a Value.
  3. Choose an Action: Update Selected replaces the value, Append to Existing adds to it, and Make Empty clears it.
  4. Click Apply.
STEP 2

Copy documents to a folder

  1. Under 2. Copy to Folder, click a folder in the list.
  2. Click Copy to Selected to add the selected documents to that folder, or Remove from Selected to take them out of it.
  3. Use + New Folder or + Subfolder to create a folder first if you need one.
STEP 3

Tag many documents

Under 3. Tag Records, click Tag Selected Records, type the name of an existing tag, and click OK.

Be careful: 4. Delete > Delete Selected Records removes the selected documents from the case. JurisReview asks you to confirm first. Check with your review administrator before you delete documents.

How do I redact or mark up a document?

You can draw redactions, highlights, notes and freehand marks on any document shown as a PDF. Your markups are saved automatically as you work.

STEP 1

Open the document as a PDF

Click the document in the grid. If it doesn't open as a PDF, click PDF at the top of the viewer. The Markup: toolbar appears above the page.

STEP 2

Add a redaction

  1. Choose a redaction style: Black Box / White Text or White Box / Black Text.
  2. Choose a label to print in the box: No Label, REDACTED, PRIVILEGED, CONFIDENTIAL, ATTORNEY-CLIENT, WORK PRODUCT or PERSONAL.
  3. Click Redact, then drag a box over the content you want to hide.
  4. Click Redact again to turn the tool off.
STEP 3

Add other markups

  • Highlight: drag a box over text to highlight it.
  • Text: click on the page, type your note, and click OK.
  • Draw: draw freehand on the page.

Choose the color for highlights, notes and drawings (Yellow, Red, Blue, Green or Black) from the color drop-down on the toolbar.

STEP 4

Check or correct your work

  • Peek makes redactions see-through so you can check what's underneath. Click it again to make them solid.
  • Undo removes your last markup.
  • Clear removes every markup from the document, after you confirm.

Tip: If your coding layout includes redaction fields such as Redaction or HasRedaction, remember to fill them in too so the document is tracked correctly. Some layouts won't let you move on until a document marked for redaction has been redacted.

How do I set up coding layouts for my reviewers?

Coding layouts decide which fields reviewers see in the Coding panel, and in what order. You need administrator rights to set them up. If you don't see the Admin tab on the left side of the screen, ask your administrator for access.

STEP 1

Open the Coding Panel Manager

  1. Open the case you want to set up.
  2. Click the Admin tab, then click Coding Panel Manager.
STEP 2

Choose and order the fields

  1. Under Coding Fields & Order, tick the fields you want on the panel. Type in Filter fields... to find a field quickly.
  2. Drag the selected fields, or use the up and down arrows, to put them in order.
  3. Use All, Default or Clear to quickly select every field, the default fields, or none.
STEP 3

Save the layout

Under Save Current Panel, type a name and click Save New. Reviewers can then pick the layout from the drop-down in the Coding panel heading.

STEP 4

Change an existing layout

  1. Choose the layout from Load Panel.
  2. Make your changes, then click Update Panel.
  3. Click Rename to give it a new name, or Delete to remove it.

Set the choices for a field

To control the options that appear in a drop-down or option field, open Admin > Choice Manager:

  1. Under New Choice List, type a list name and enter the choices, one per line.
  2. Click Create Choice List.
  3. Under Assign Choice List to Field, pick the list and the field, then click Assign to Field.

Share layouts between cases

Use Export in the Coding Panel Manager to save the case's layouts to a file. Then open another case and use Import to load them.

JurisCloud

Case preparation and sync to the courtroom.

JurisCloud

4 articles
How do I open a case in JurisCloud and find my way around?

JurisCloud is where you prepare a case for trial in your browser. You stage exhibits, transcripts and trial documents there, so they're organized and ready to sync to JurisTrial.

STEP 1

Open JurisCloud

Click the JurisCloud card on the JurisLit home screen. It opens the case you used last, or on your first visit, the first case you have access to.

STEP 2

Switch cases

At the top left, click JurisCloud or the case name next to it. Your cases are listed, with a tick next to the one that's open. Click a case to load it.

STEP 3

Use the tabs on the left

  • Explore: browse the case's folders, search, and view documents.
  • Import: upload documents to the case. This tab appears only if your group is allowed to import.
  • Statistics: counts of documents, pages, and audio and video files, plus the case size.
  • Reports: tick one or more folders (or Select All) and click Export CSV to download a list of their documents.
  • Activity: the case's activity log, showing who viewed, uploaded or deleted files, and when.
  • Case Info: case details such as the case number, court, judge, clerk, contacts, and hearing and trial dates. Click Save after making changes.
  • Trash: deleted documents. Select items and click Restore to bring them back. Auto Delete By shows when each item will be removed automatically. Permanently Delete removes an item right away and can't be undone.

No cases showing? Ask your firm administrator to give your permission group access to the case in JurisAdmin.

How do I upload and organize exhibits and trial documents in JurisCloud?

Every case starts with a standard set of JurisCloud folders that match JurisTrial: Full Case, Exhibits, Sync Transcripts, PDF Transcripts, Case Documents, Presentations, Photos, Graphics and Videos/Audio. Upload your documents first, then file them into the right folders.

STEP 1

Upload your files

On the Import tab, click Process Loose Files. Drag files or folders onto Drag files or folders here, or click that area to choose them. You don't need to zip anything. Progress moves through Upload, Unpack, Process & Insert and Done. When you see Upload & Processing Complete, click OK.

If your connection drops, JurisCloud retries on its own. If it still can't reconnect, it tells you nothing was imported, and you can safely try again.

STEP 2

Find the new documents

On the Explore tab, expand the JurisCloud folder. New uploads appear in Full Case.

STEP 3

File documents into a folder

Tick the documents in the grid. Open the Action menu, choose Copy to Folder, pick a folder such as Exhibits, and click Copy. You can make a new folder from the same window with + New Folder. Choose a folder inside JurisCloud, not the JurisCloud folder itself.

STEP 4

Add your own subfolders (optional)

Right-click a folder and choose Add Subfolder. The same menu has Rename and Delete Folder. Deleting a folder doesn't delete the documents in it.

STEP 5

Take documents out of a folder

Right-click the folder and choose Remove selected records (for the ticked documents) or Remove ALL records from folder. The documents stay in the case; they just aren't filed in that folder any more.

Tip: Leave the standard folder names as they are, so everything lines up when the case syncs to JurisTrial.

Uploading and filing documents need the right permissions. If you can't see Import or Copy to Folder, ask your firm administrator.

How do I review a synced deposition transcript and build clips in JurisCloud?

Synced deposition transcripts, where the text follows along with the video, are kept in the Sync Transcripts folder. Ordinary transcript documents, such as PDFs, go in PDF Transcripts and open in the normal document viewer.

STEP 1

Open the transcript

On the Explore tab, open Sync Transcripts and click the transcript. The deposition player opens full screen, with the video beside the synced text. If it shows No linked video, check that the matching video file has been added to the case.

STEP 2

Play and search

Use the play, stop and mute controls at the bottom. Switch between Both, Video and Text views, resize the text with A+ and A−, and find words with Search transcript....

STEP 3

Create a clip

Click Create Clip, set the start and end points with Save Start and Save Stop, then click Save Clip and name the clip. Your clips are listed under Clips on the left. Right-click a clip to Edit Clip, Add Segment, Rename or Delete Clip. To join clips, select two or more and click Combine.

STEP 4

Share clip lists with JurisTrial

Click Export to save your clips as a .txt clip list that JurisTrial can read. Click Import to load a clip list someone else made.

STEP 5

Add notes

Type in the Notes box and press Enter to post a note at the current point in the video.

Click the back arrow at the bottom left to close the player.

How do JurisCloud and JurisTrial stay in sync?

You prepare a case in JurisCloud and present it in court with JurisTrial Desktop. Before trial, JurisTrial syncs the case's JurisCloud folders to your computer, so you can present from local storage even where the courtroom network is unreliable. You run the sync from JurisTrial.

Before you sync

  • File everything you need into the JurisCloud folders, such as Exhibits, Sync Transcripts and Videos/Audio. JurisTrial works with what's in JurisCloud.
  • Check that the presenter has JurisCloud / JurisTrial access and has been given the case in JurisAdmin.
  • Install JurisTrial Desktop from the JurisLit home screen (see the Downloads articles).

Seeing changes that came from JurisTrial

If someone syncs changes from JurisTrial while you have the case open in JurisCloud, click Refresh View in the toolbar above the grid. JurisCloud re-reads the case and updates the grid, the folder counts and the open document. Your current folder, filter, selection and scroll position stay as they were. A message tells you what changed, for example View refreshed — +3 records.

JurisAdmin

Users, permission groups, and case access.

JurisAdmin

9 articles
What is JurisAdmin and how do I open it?

JurisAdmin is where your firm's administrators control who can use JurisLit and which cases each person can open. Members of your firm's Case Admins group can use it, as can anyone given the Manage users permission.

STEP 1

Open the JurisAdmin door

Click the JurisAdmin card on the JurisLit home screen. The console is titled JurisLit Admin.

STEP 2

Choose a tab on the left

  • Cases: create, rename, duplicate, export or delete cases.
  • Permission Groups: create groups and choose what each group can do.
  • Users: add logins, reset passwords, turn logins on or off, and assign groups.
  • Case Access: choose which groups can open which cases.
  • Folder Access: within a case, limit which folders a group can see.
  • Activity: who did what, and when, across all cases. Filter it, or use Export CSV.
  • Deleted Cases: restore a deleted case, or remove it permanently.
  • Subscriptions: for your firm's account owner and account admins. Shows your plan, seats and account details.

The top bar also has View As, which previews what a group sees, and My Security, which sets up two-factor authentication.

Some tabs only appear if your group has the matching permission. For example, Permission Groups and Case Access need Manage permission groups.

How do I add a new user to my firm?

For each person who needs JurisLit, create a user, add them to a permission group, and make sure that group has access to the right cases.

STEP 1

Open the Users tab

In JurisAdmin, click Users, then + New User.

STEP 2

Fill in the login details

Enter a Username, Display name, Email and Password. An email address is required.

STEP 3

Choose the seat

If you see a Customer account section, choose your firm under Account and the subscription under Subscription seat. If the subscription is already full, a seat is added for the new user automatically, and billing reflects the extra seat.

STEP 4

Assign groups

Under Assign to groups (optional — can edit later), tick the permission groups this person belongs in.

STEP 5

Create the user

Click Create. Send the username and password to the person securely. They sign in on the JurisLit sign-in page.

Remember: a user can open a case only if one of their groups has that case on the Case Access tab.

How do I reset a password, turn off a login, or remove a user?

You do all of these from the Users tab in JurisAdmin. To find someone quickly, use the filter boxes under the column headings.

Reset a password

  1. Click Reset PW in the user's row.
  2. Type the new password and click OK.
  3. Send the new password to the user securely.

Turn a login off (or back on)

  1. Untick the Active box in the user's row.
  2. Confirm. The user is signed out immediately and can't sign in again until you tick the box.

Change details or groups

  1. Click Edit.
  2. Change the Display name, Email or password, or tick and untick Permission Groups.
  3. Click Save.

Reset two-factor authentication

If a user has lost the phone with their authenticator app, click Edit and then Reset 2FA. They can then sign in with just their password and set up two-factor authentication again.

Remove a user

Click Edit, then Delete user, and confirm. If you might need the login again later, turn it off instead of deleting it.

How do I create a permission group?

A permission group controls which JurisLit products its members can open and what they can do there. Your firm starts with Case Admins and Reviewers groups, and you can add more, for example a group for your trial team.

STEP 1

Open Permission Groups

In JurisAdmin, click Permission Groups, then + New Group.

STEP 2

Name the group

Give it a Name and a short Description so other administrators know what it's for.

STEP 3

Choose permissions

Under Permissions, tick what members can do. The Doors section controls which products they can open. For example, tick JurisCloud / JurisTrial for anyone who prepares or presents trial material. The remaining sections cover cases, documents, tags and folders, coding, search and productions, imports, and administration.

STEP 4

Save the group

Click Create. To change a group later, click its row, adjust the permissions, and click Save.

STEP 5

Add members and cases

Add people from the Users tab (Edit, then Permission Groups). Then give the group its cases on the Case Access tab.

Tip: If you manage your firm's account, the Subscriptions tab has a Create firm groups button. It adds whichever standard groups you don't have yet: Case Admins, Reviewers, and a Trial group with JurisCloud / JurisTrial access.

Before you add people to a new group, use View As to check what it can see.

How do I give someone access to a case?

Case access goes to groups, not to individual people. Everyone in a group can open the group's cases. To give someone a case, make sure they're in a group that has it.

STEP 1

Open Case Access

In JurisAdmin, click Case Access.

STEP 2

Choose how to work

  • By Group: choose a group in the Group list and tick the cases it should open.
  • By Case: choose a case in the Case list and tick the groups that should open it. A new case shows no grants yet until you give it to a group.
  • Overview: a grid of every group against every case. Click a cell to switch access on or off.
STEP 3

Tick the boxes

Each change is saved as soon as you click. To change many at once, use Grant all shown or Revoke all shown. In By Group, Copy grants from gives the selected group every case another group already has.

STEP 4

Check the person is in the group

On the Users tab, click Edit for the person and make sure the group is ticked under Permission Groups.

Limiting folders within a case (optional)

To hide some of a case's folders from a group, for example so experts see only certain material, open Folder Access and choose the Case and Group. Ticked folders are visible to the group, and unticked folders are hidden. Grant all access and Deny all access give you a starting point. Click Save when you're done.

How do I create, rename or delete a case?

You create and manage cases in JurisAdmin. Once a case exists, anyone with access can open it in JurisCloud.

Create a case

  1. Open the Cases tab and click + New Case.
  2. Type the case name and click OK. The next prompt lets you add an optional description.
  3. On Case Access, give the case to each group that should work on it.

Other case actions

  • Rename: change the case name.
  • Duplicate: start a new case with the same setup (settings, fields, layouts, tags and folders) but no documents.
  • Export: download the case as a package.
  • Delete: move the case to Deleted Cases.

Restore a deleted case

Open Deleted Cases, tick the case and click Restore selected. Delete permanently removes the case and all its documents for good, and can't be undone.

How do I preview what a permission group can see?

View As lets an administrator see JurisLit as a member of a chosen group would: the same products, cases, folders and buttons. Use it to check a group's setup before you add people to it.

STEP 1

Choose a group

In JurisAdmin, click the orange View As button at the top and pick a group from Open the app as:. Inside a product, you'll also find View As next to Help.

STEP 2

Look around

The app reloads with that group's permissions. While you're previewing, the orange button reads Viewing as followed by the group name and Stop, so it's always clear this isn't your own view. You stay signed in as yourself, and anything you change is recorded under your name.

STEP 3

Stop previewing

Click the orange Viewing as … · Stop button to go back to your own view.

View As is available to administrators who can manage permission groups.

How do I check my firm's subscription and seats?

Your firm's account owner and account admins can see the firm's plan in JurisAdmin.

STEP 1

Open Subscriptions

In JurisAdmin, click Subscriptions. The page is titled Subscriptions — your account and opens your firm's details. You can also get here from the View subscription link on the trial banner on the JurisLit home screen.

STEP 2

Review your account

  • The top line shows your firm name, account code, license key (click it to copy) and status.
  • Account details: update the firm's Name, Billing email, Billing preference and Notes, then click Save details.
  • Subscriptions: each package with seats used and seats available, its status (for example trial or active), the period end date and the price for its billing period (per month or per year).
  • Account users: everyone attached to your firm, and their role.
STEP 3

Give someone a seat

Click + Seat next to a subscription, choose the User, and click Assign seat. To free up a seat, click the × next to that person's name.

To add packages or change your seat count, contact Island Legal Technologies. If you add a user to a subscription that's already full, a seat is added automatically.

How do I turn on two-factor authentication?

With two-factor authentication (2FA) turned on, signing in needs your password plus a 6-digit code from an authenticator app, such as Google Authenticator, Microsoft Authenticator or Authy.

STEP 1

Open My Security

In JurisAdmin, click My Security at the top, then Set up 2FA.

STEP 2

Add JurisLit to your authenticator app

In your authenticator app, choose the option to enter a setup key. Type in the Account and Key shown on screen. Copy key copies the key for you.
STEP 3

Confirm it works

Enter the 6-digit code your app shows now, and click Turn on 2FA.

From now on, the sign-in page asks for an Authentication code after your password.

To turn it off: open My Security, type your password under Confirm your password to turn 2FA off, and click Turn off 2FA. If you've lost your phone, ask another administrator to use Reset 2FA on your login.

JurisTrial

Courtroom presentation on Windows, Mac, and iPad.

JurisTrial — Getting Started

7 articles
How do I get around the JurisTrial screen?

JurisTrial has three main areas: the top bar, the left menu, and the case workspace.

  • Top bar: shows Current Case: with the open case's name. Next to it are the Switch Case button and, for cases linked to JurisCloud, a Sync button.
  • Left menu: CASE LISTS opens your list of cases, JURISTRIAL opens the trial presentation workspace, and the tools below them (FILE CONVERT, PDF EDITOR, MEDIA CONVERT, SYNC CONVERT, TRANSCRIPT SYNC, CLIP CREATOR, IPAD IMPORT) help you prepare files. The iPad app shows only CASE LISTS and JURISTRIAL.
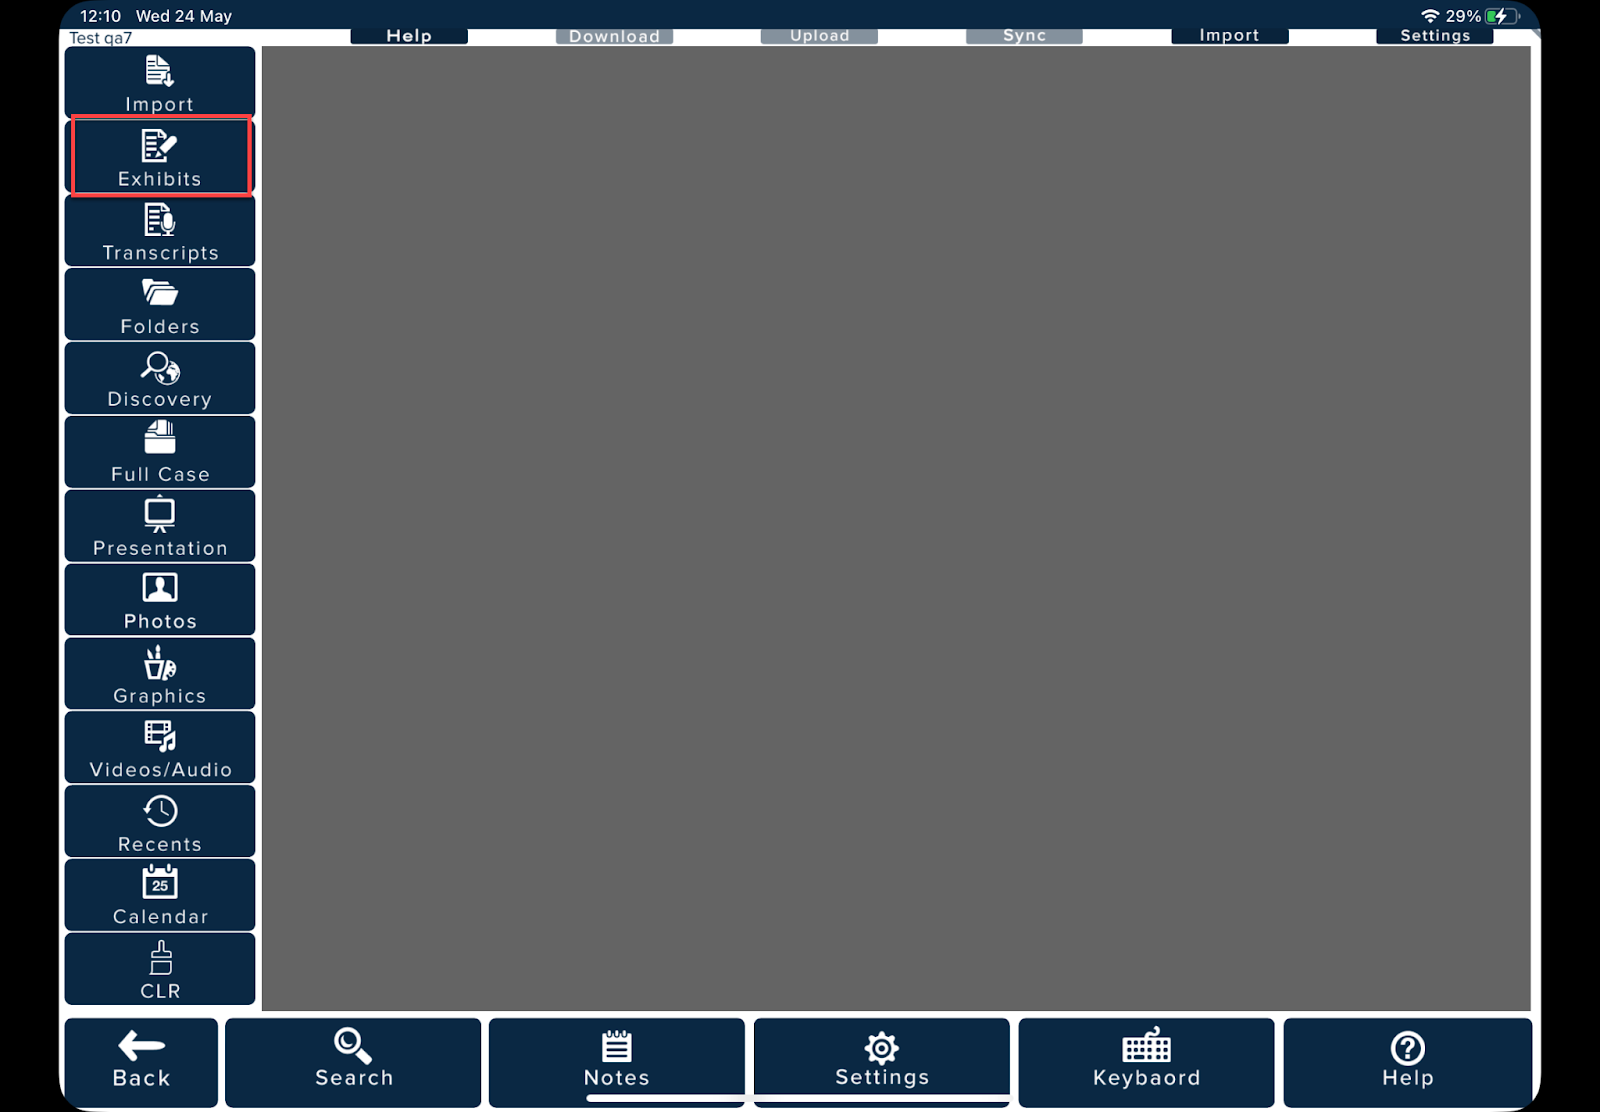
  • Case workspace: when a case is open, the home screen shows counts of Exhibits, Transcripts, Videos and Case Documents. A strip of folders runs down the side: Search, Exhibits, Sync Transcripts, PDF Transcripts, Folders, Case Documents, Presentation, Photos, Graphics, Audio/Video, Recents, Import, Full Case, Native Files and Trash.

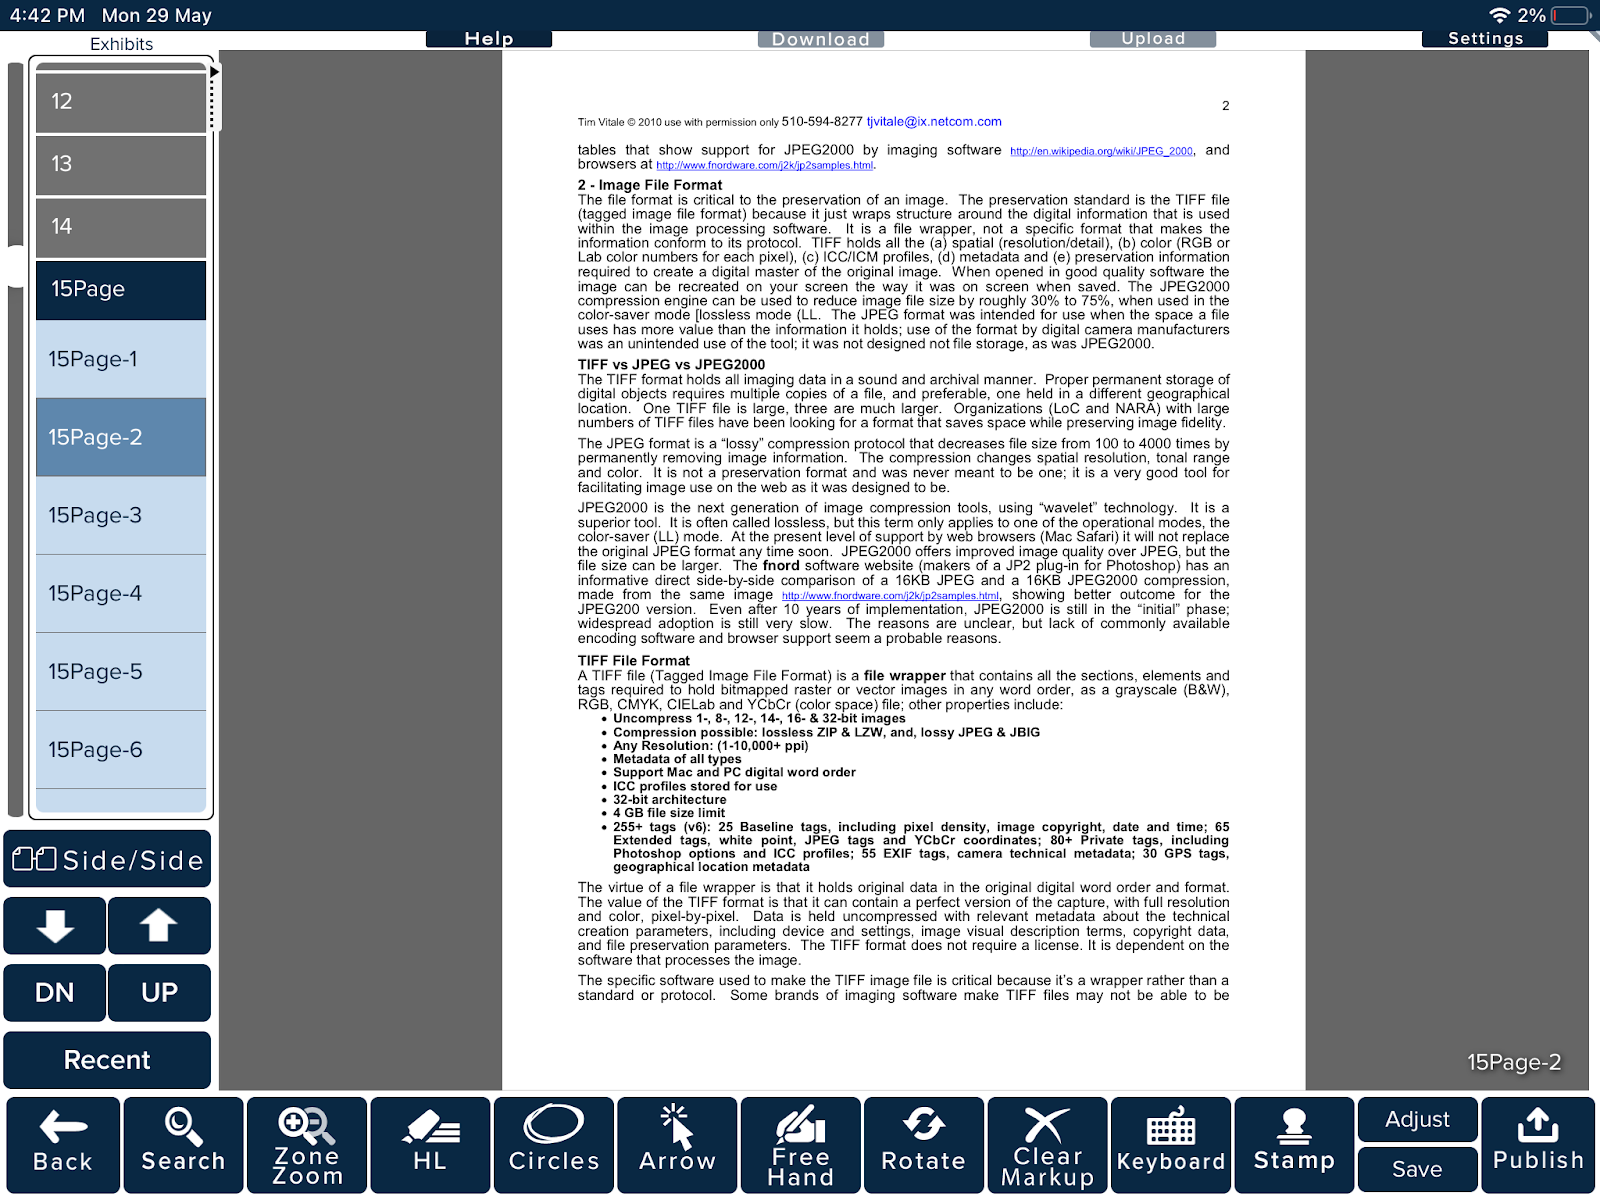
Inside a folder view

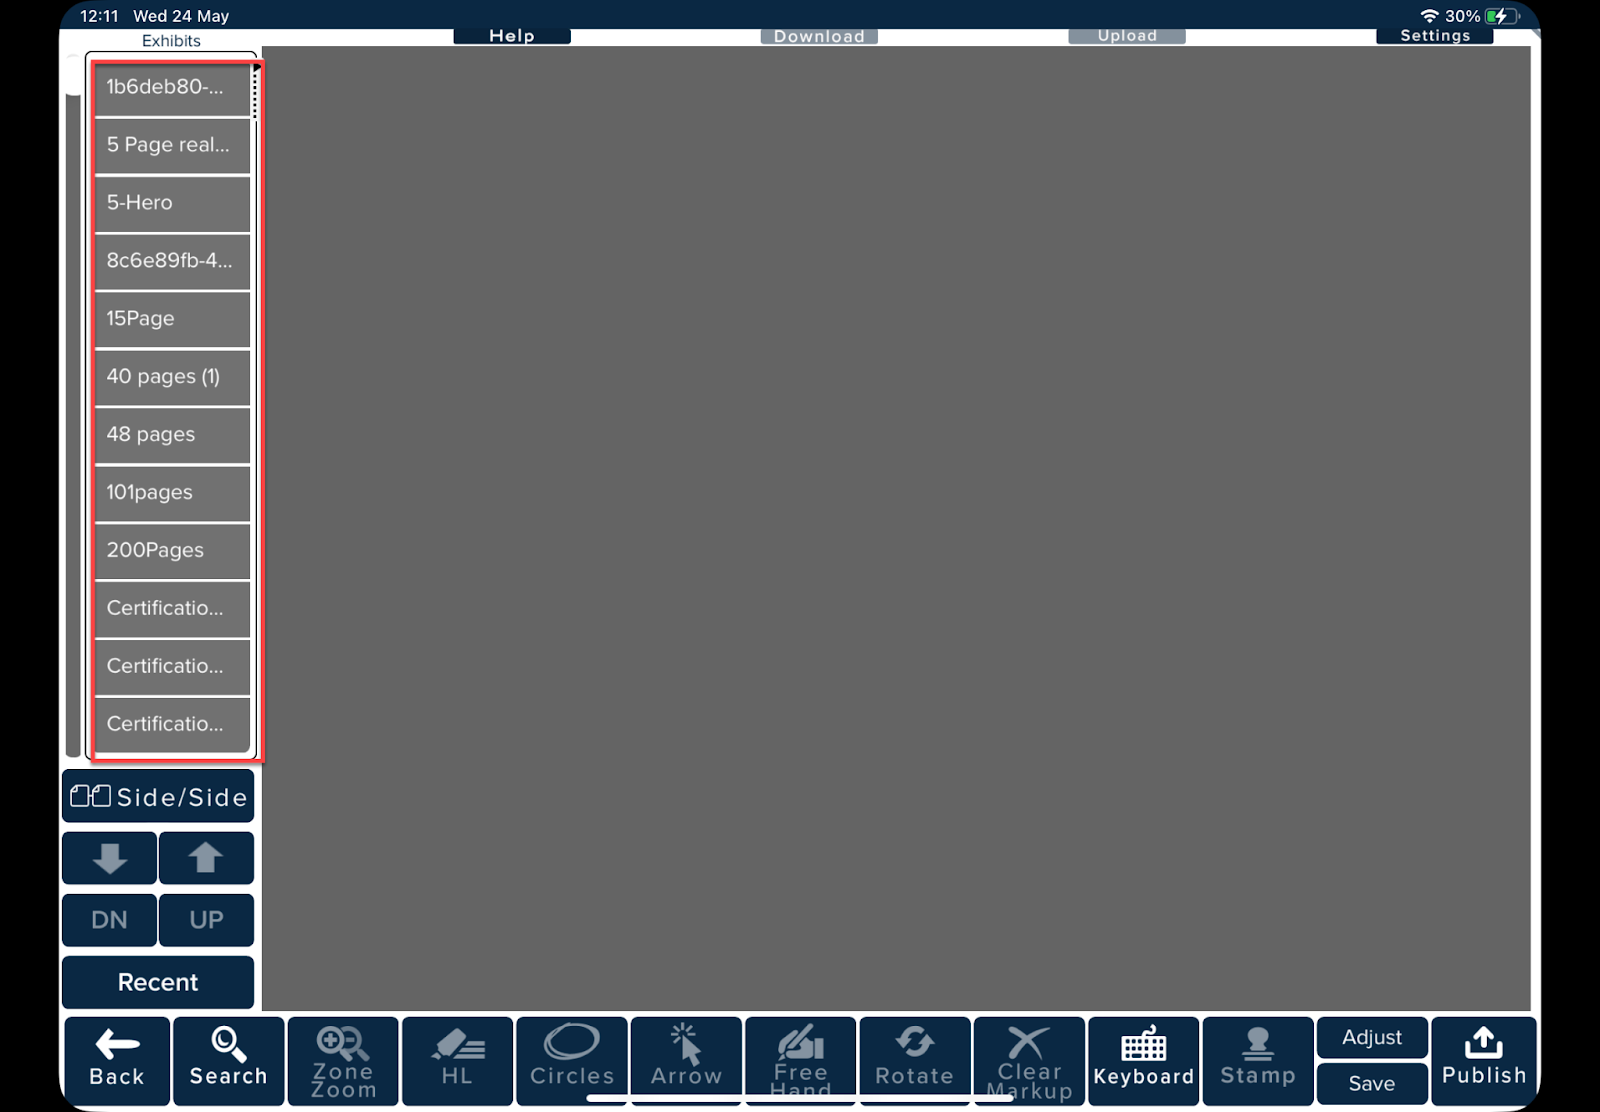
  • The Exhibit List is on the left. Click an item to open it in the viewer.
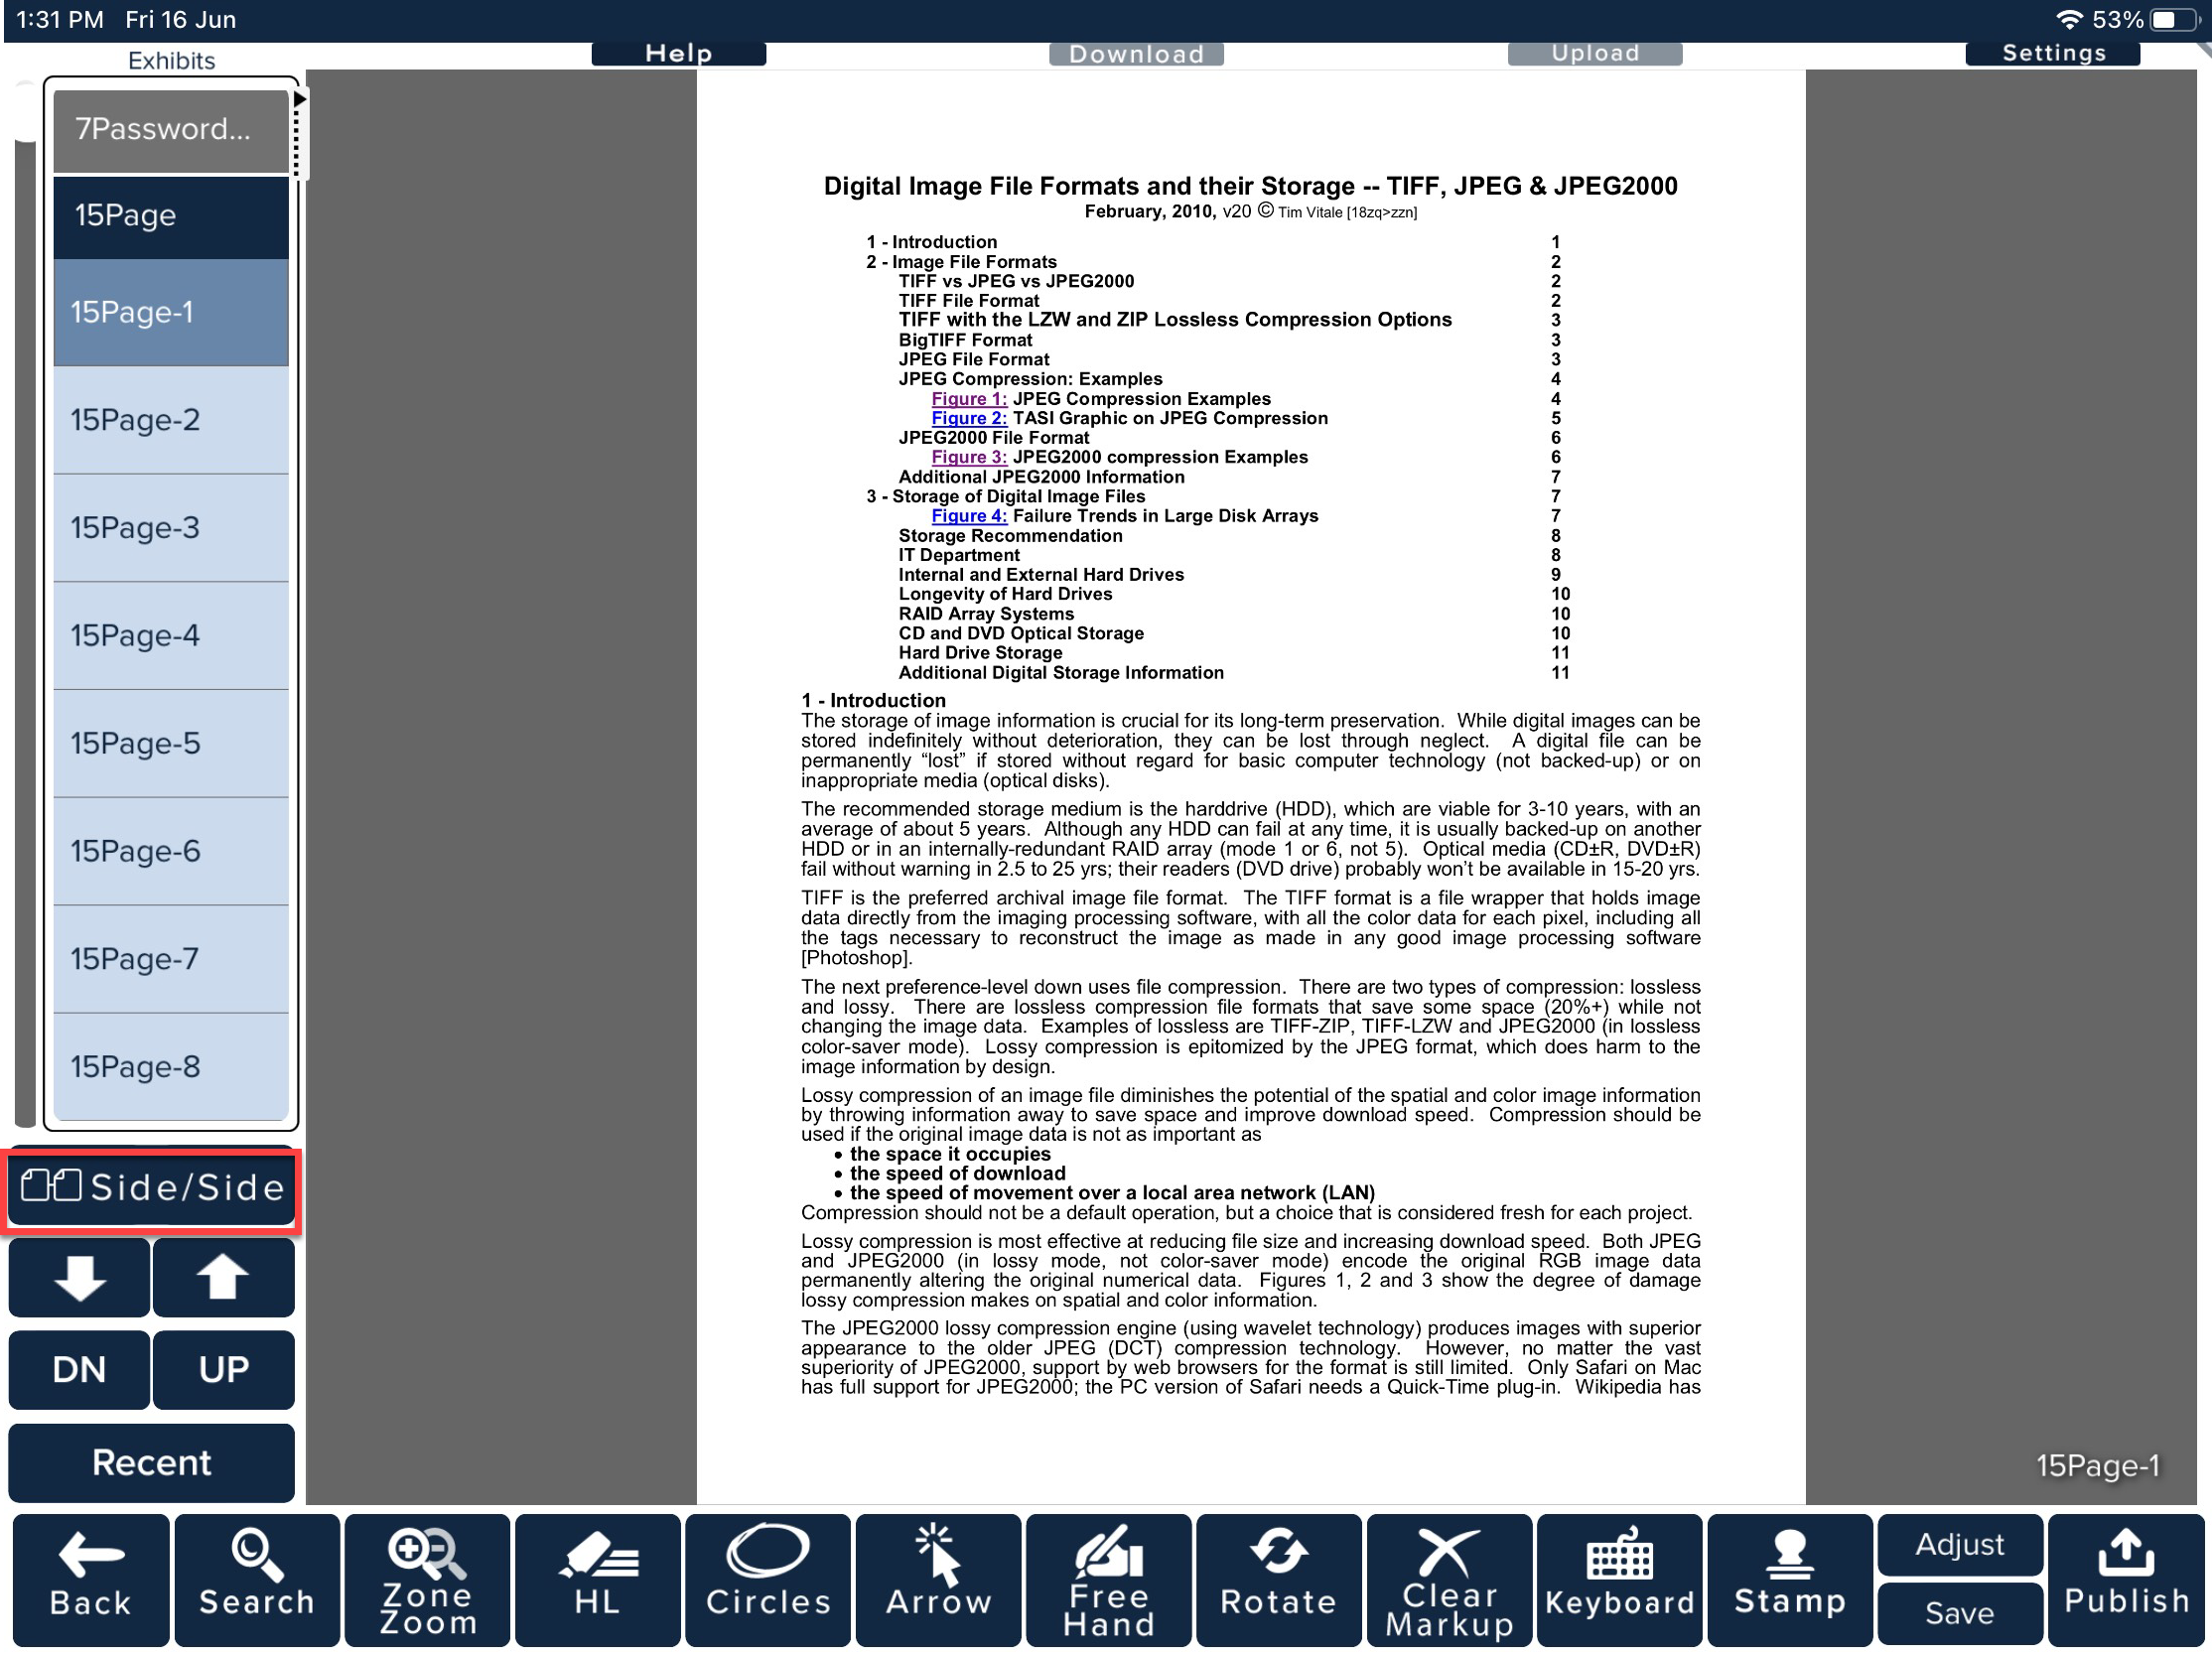
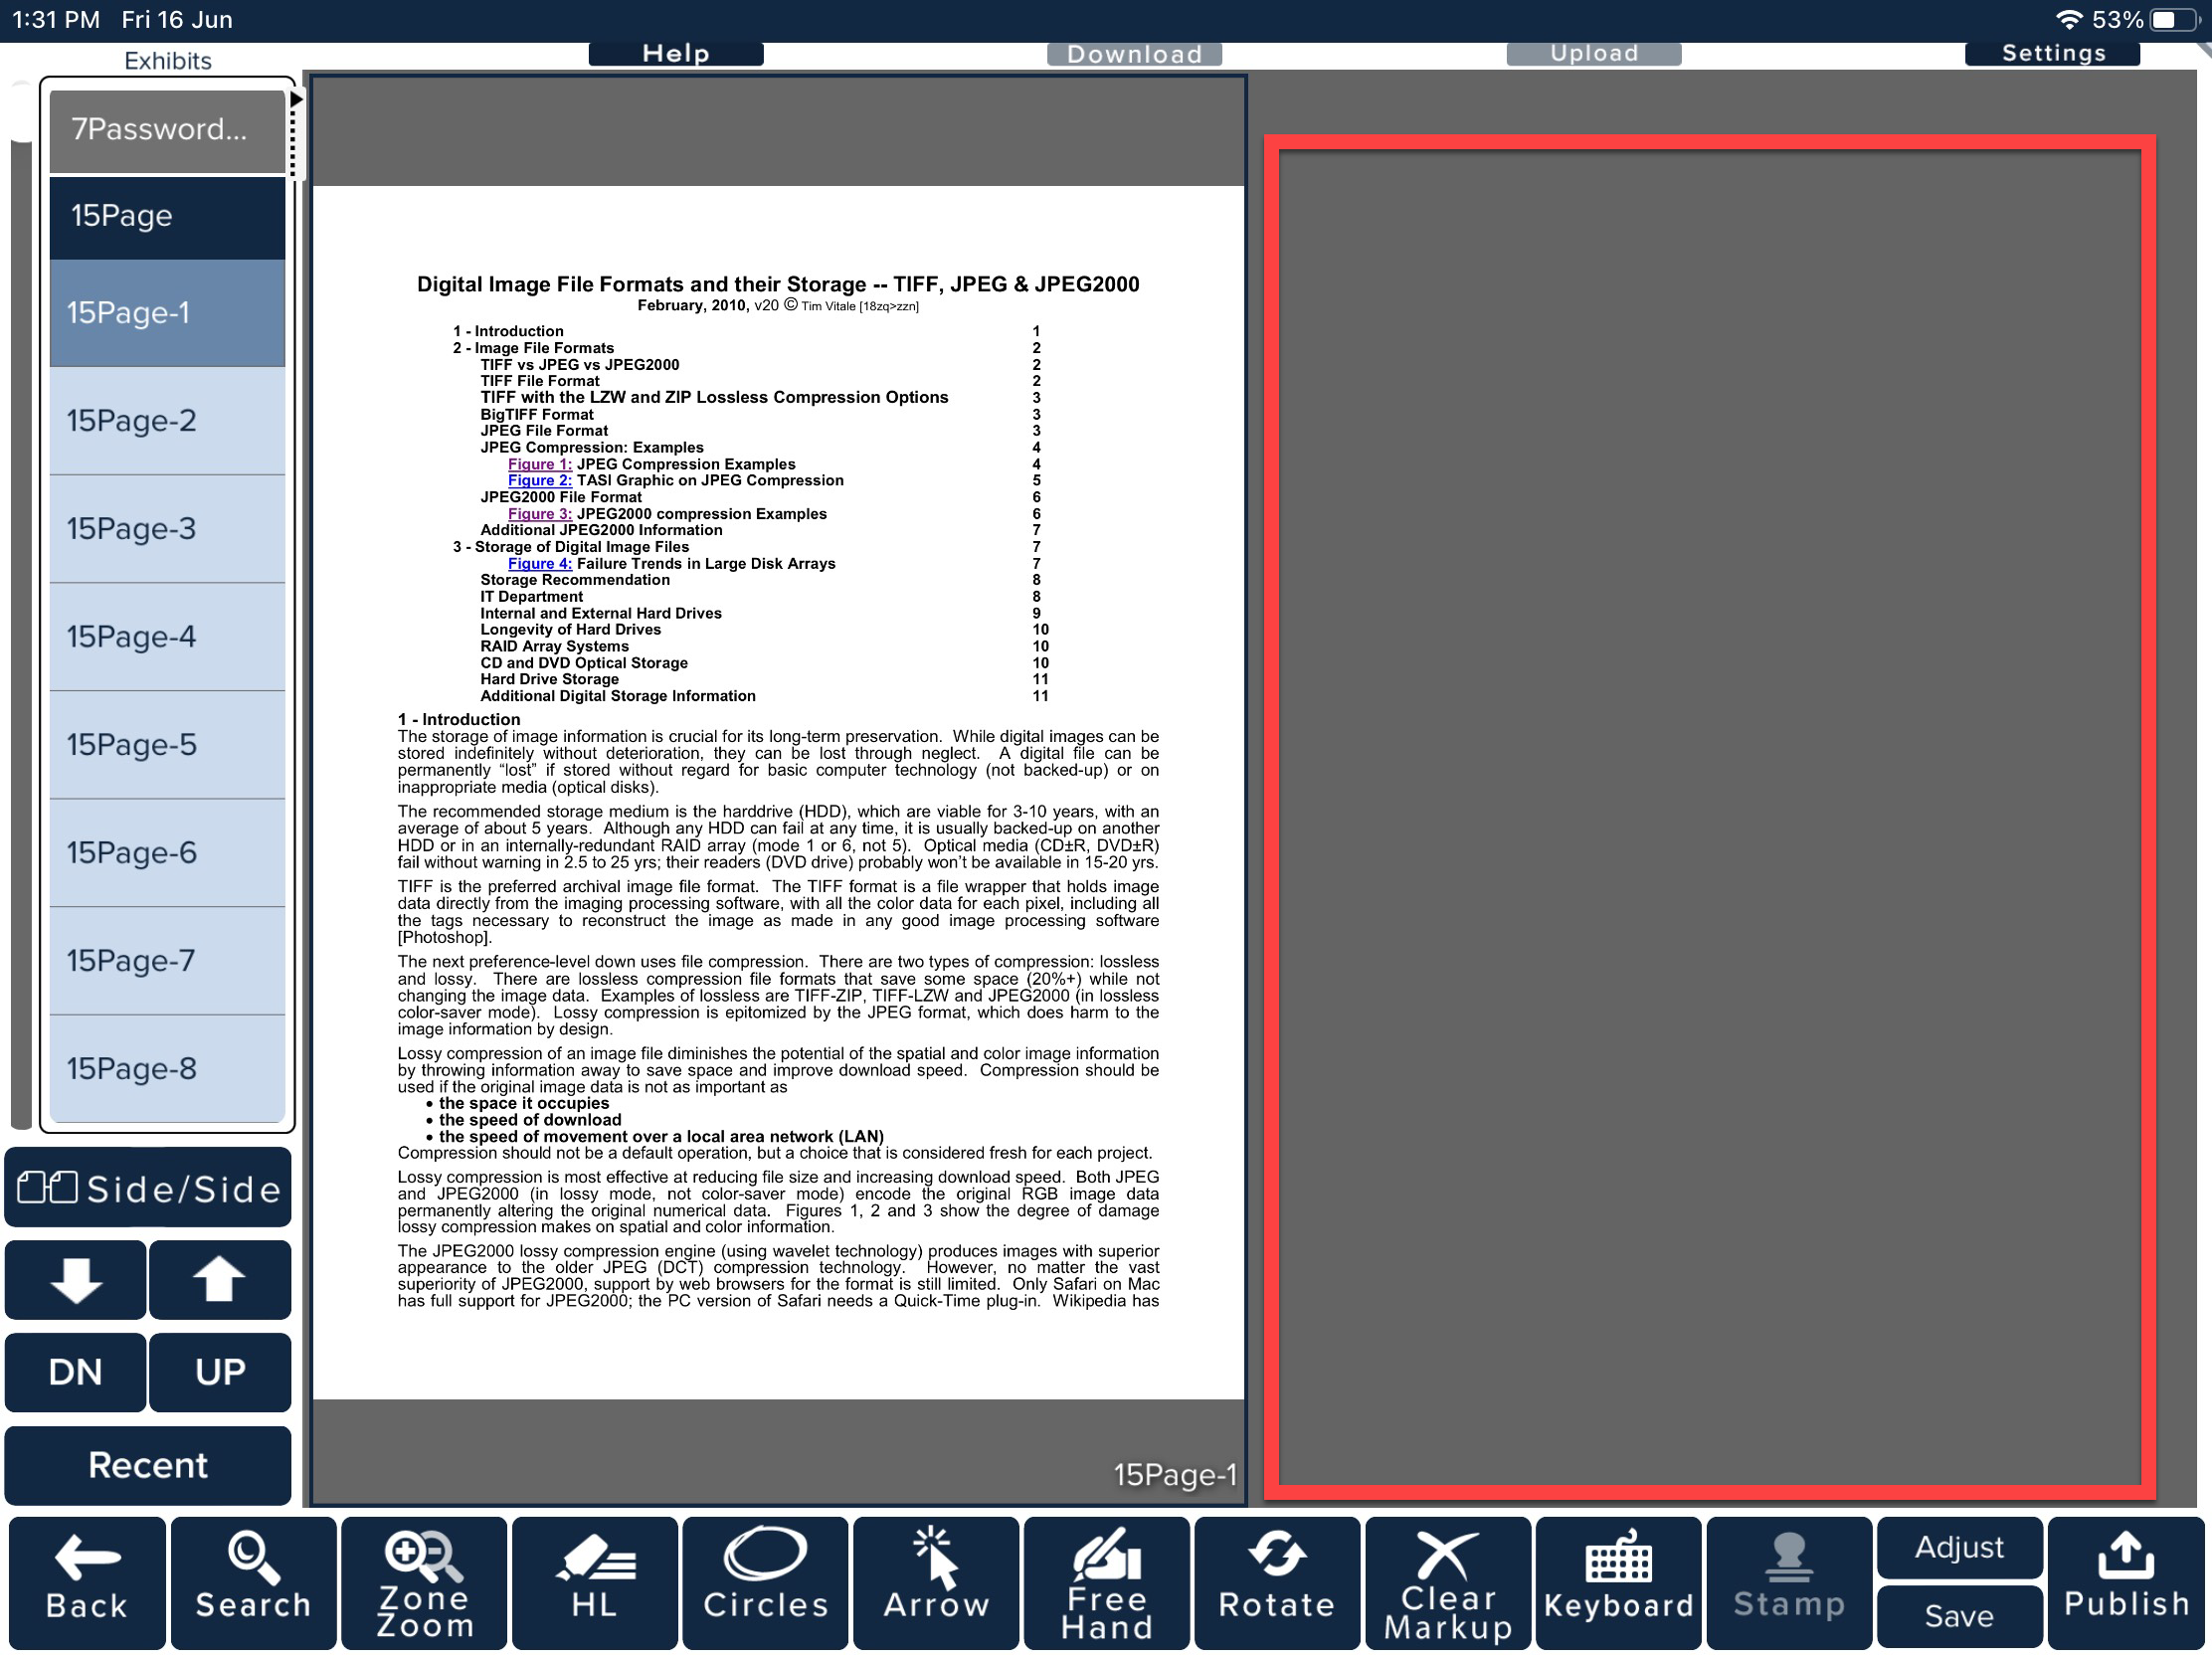
  • Under the list are Side/Side, page up/down arrows, UP and DN to move to the previous or next exhibit, and Recent. Recent shows the exhibits you displayed most recently, so you can jump back to one.
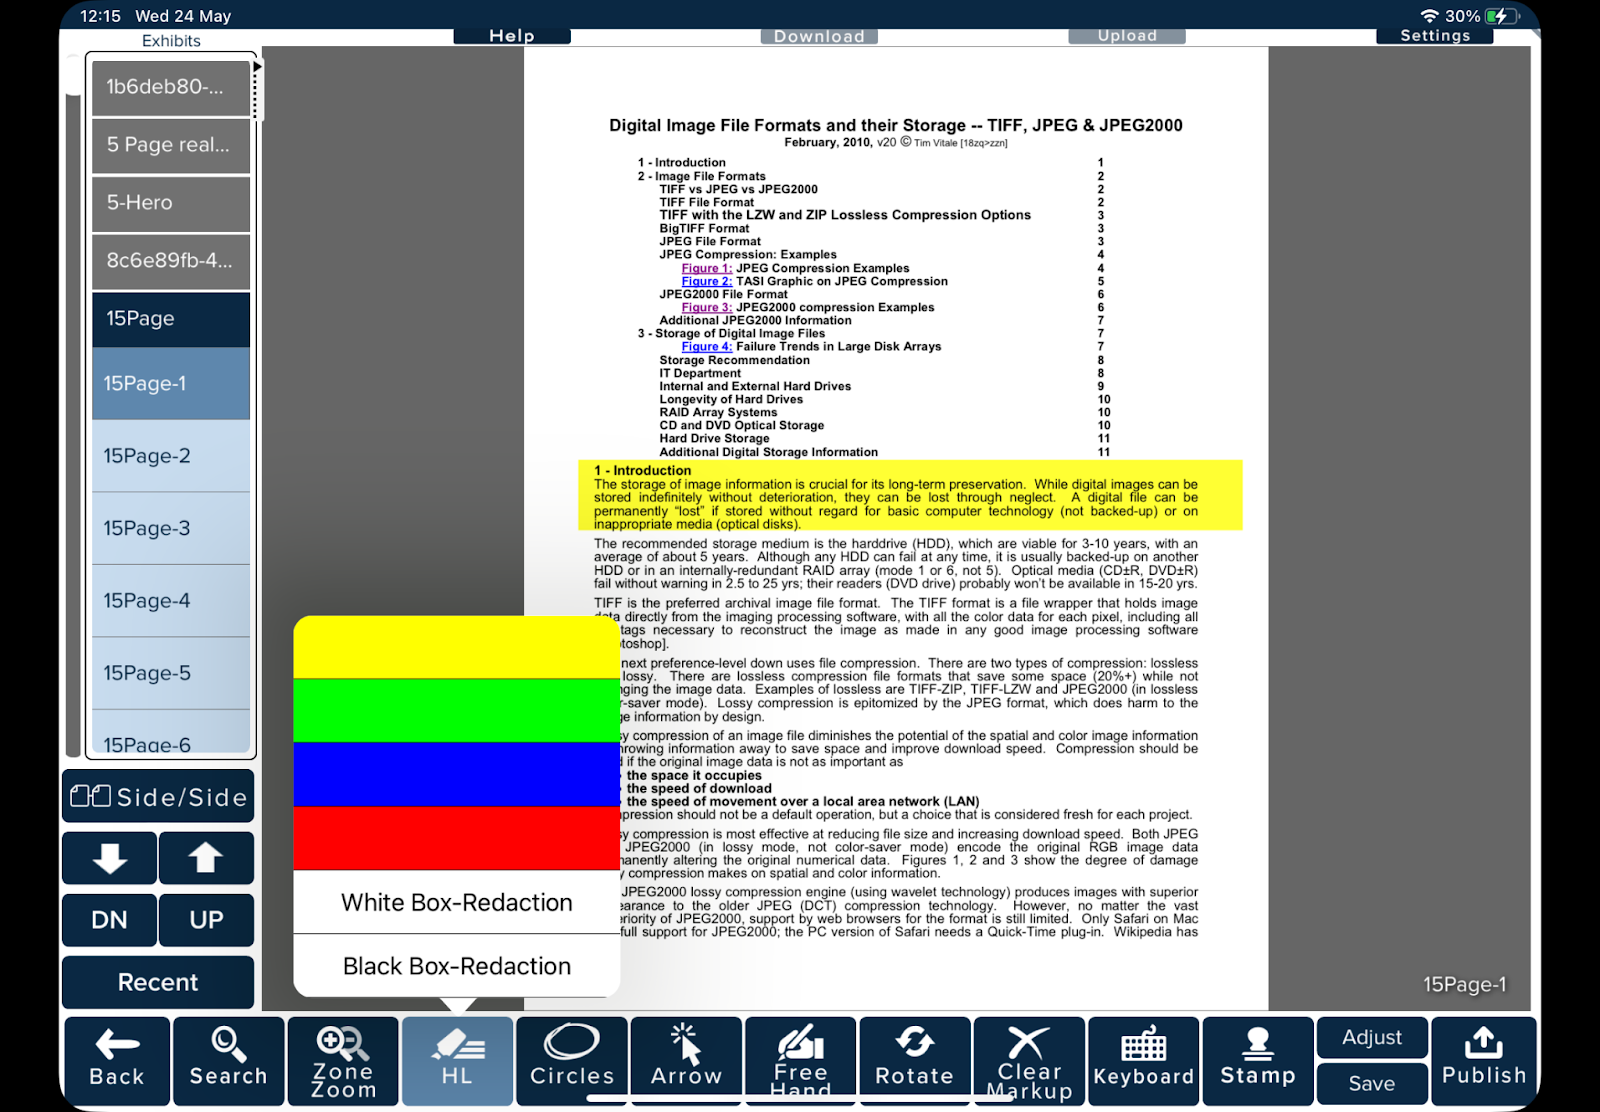
  • The action bar above the document has Select, Delete, Rename, Copy, Move, Remove, Burn Redactions, Page #, Print and Email.
  • Also on the action bar are the view options: Zoom, Scroll, Page Scroll, Fit Page and Fit Width.
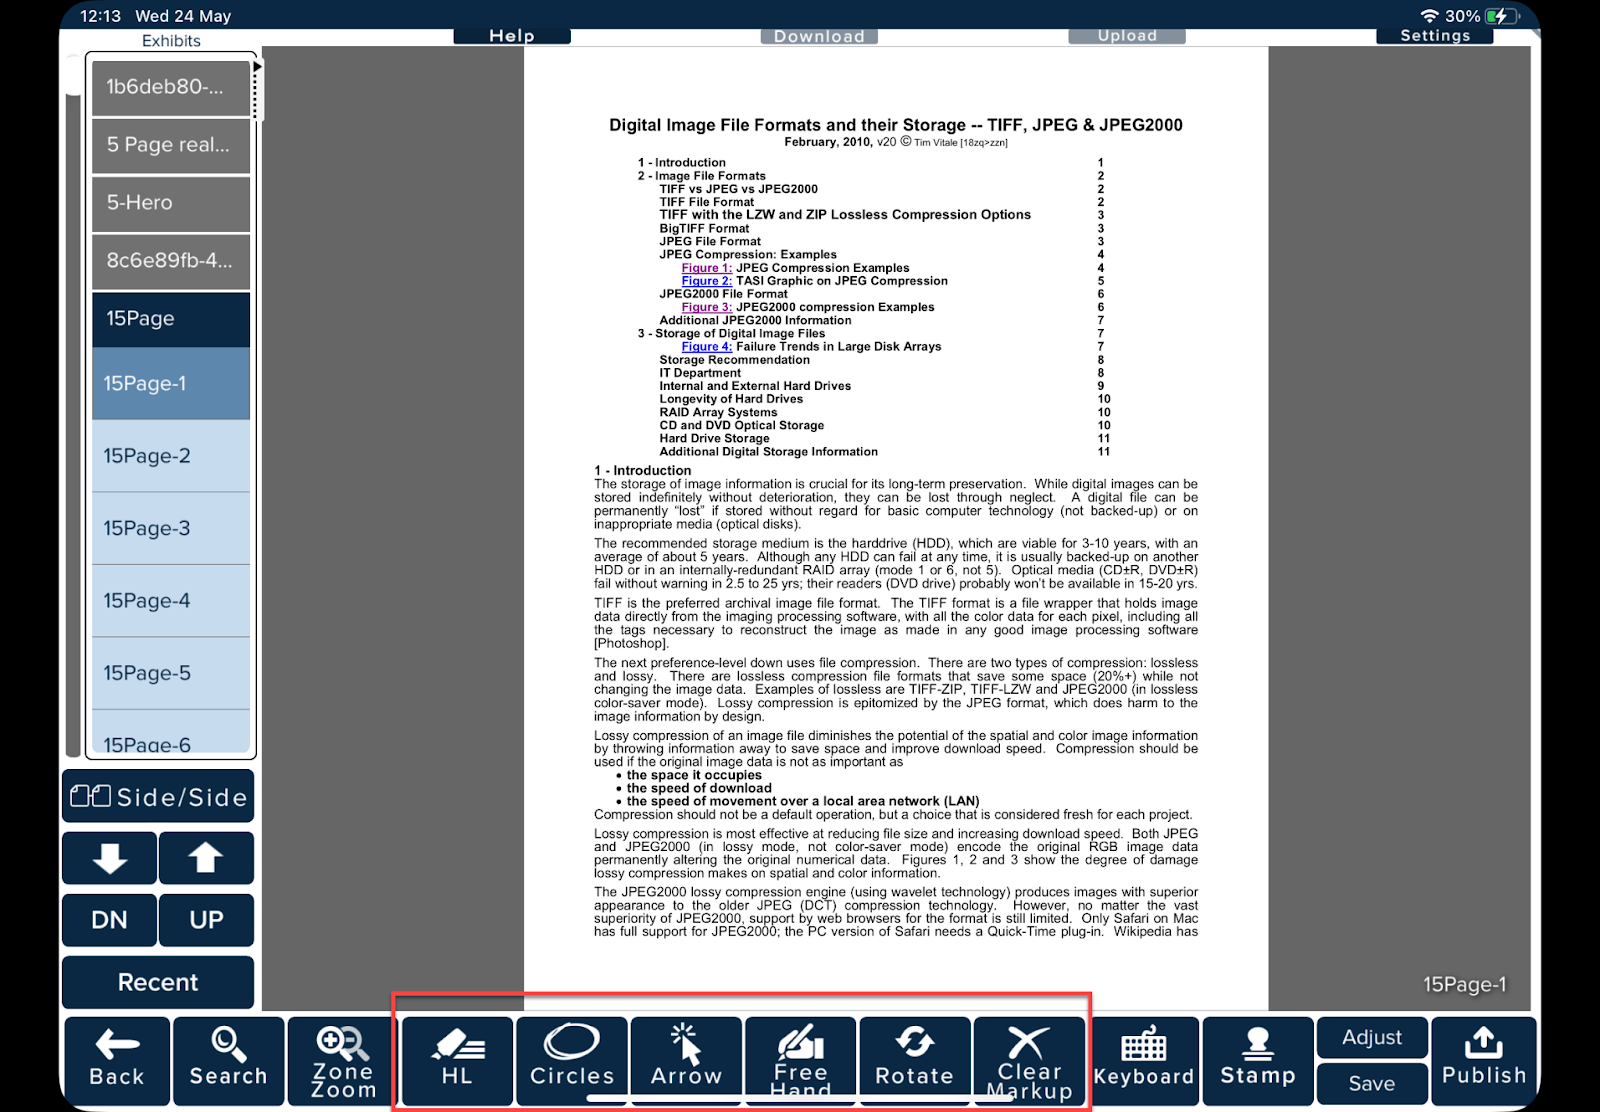
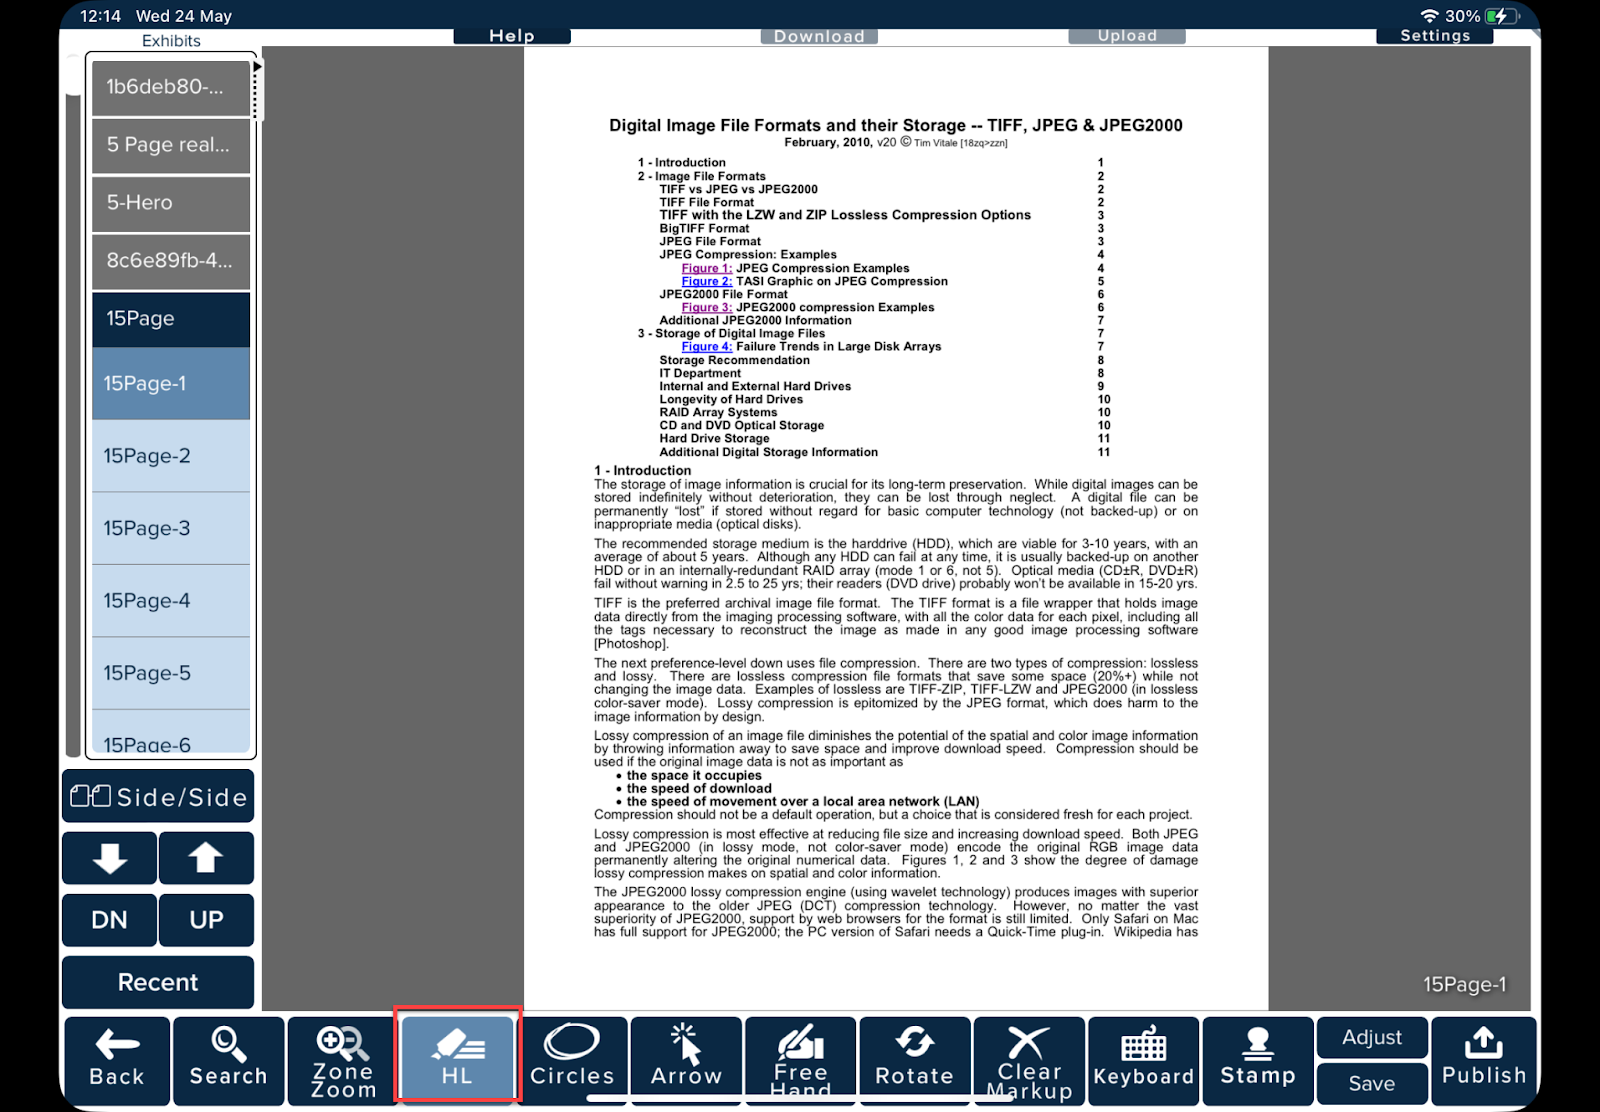
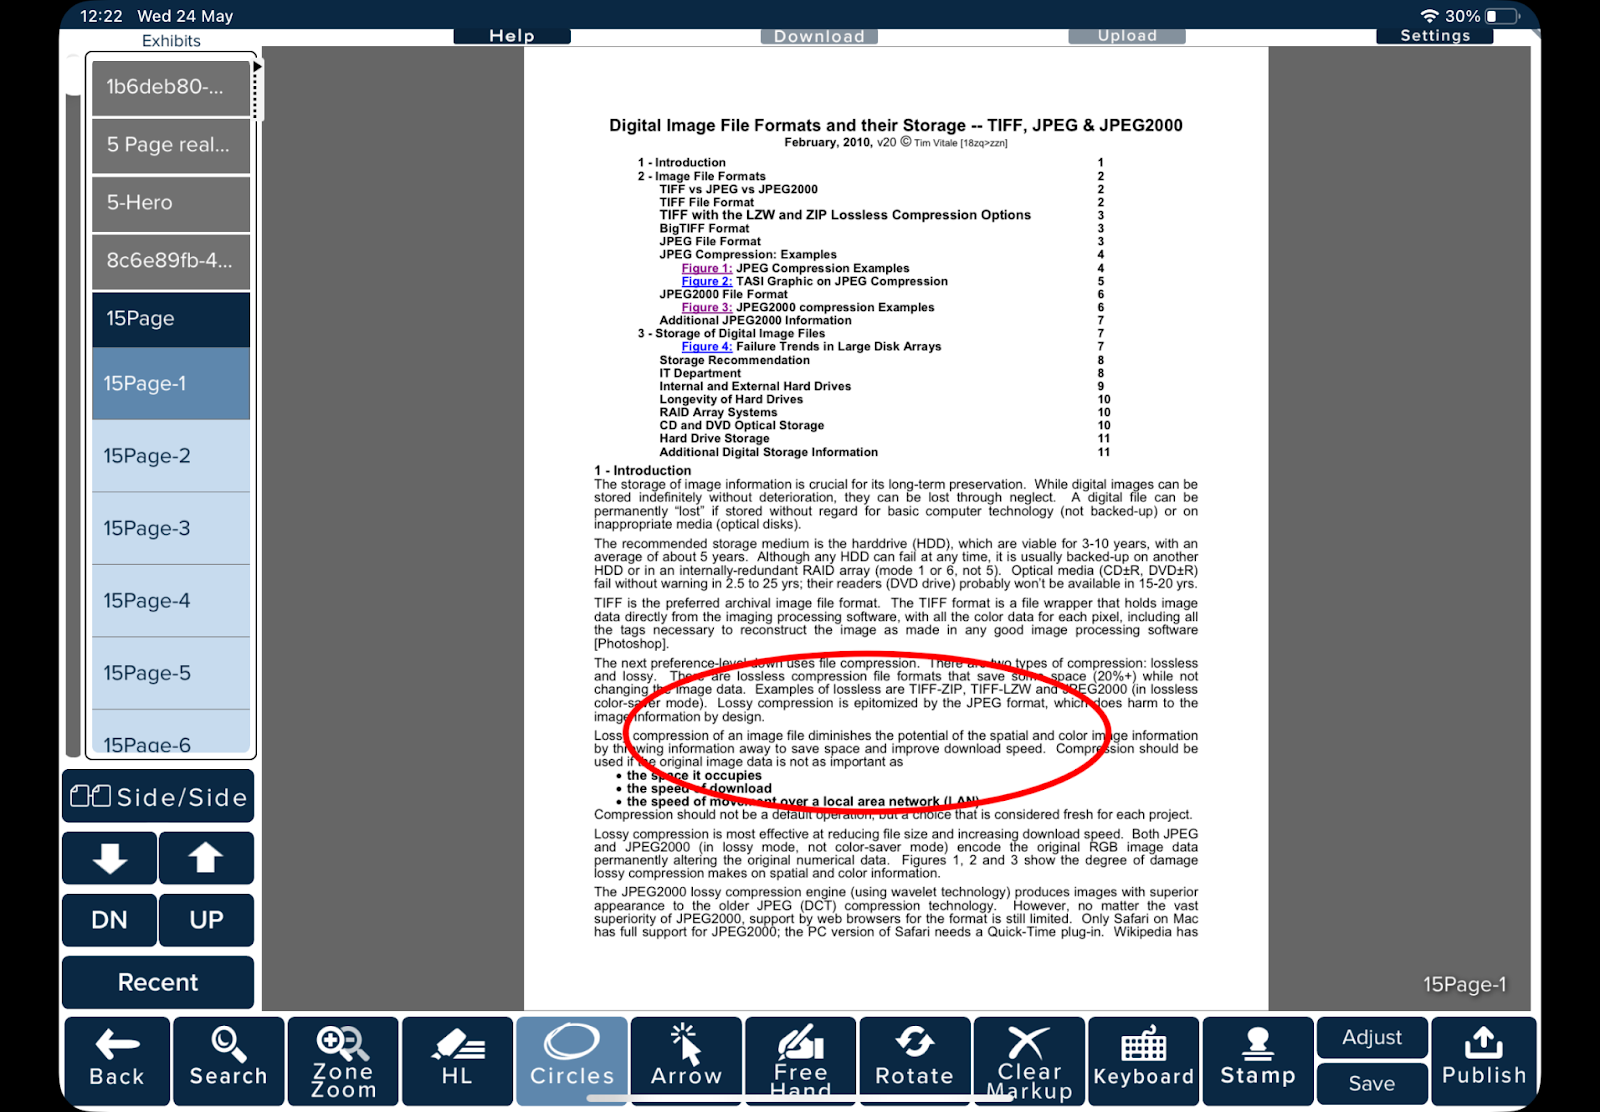
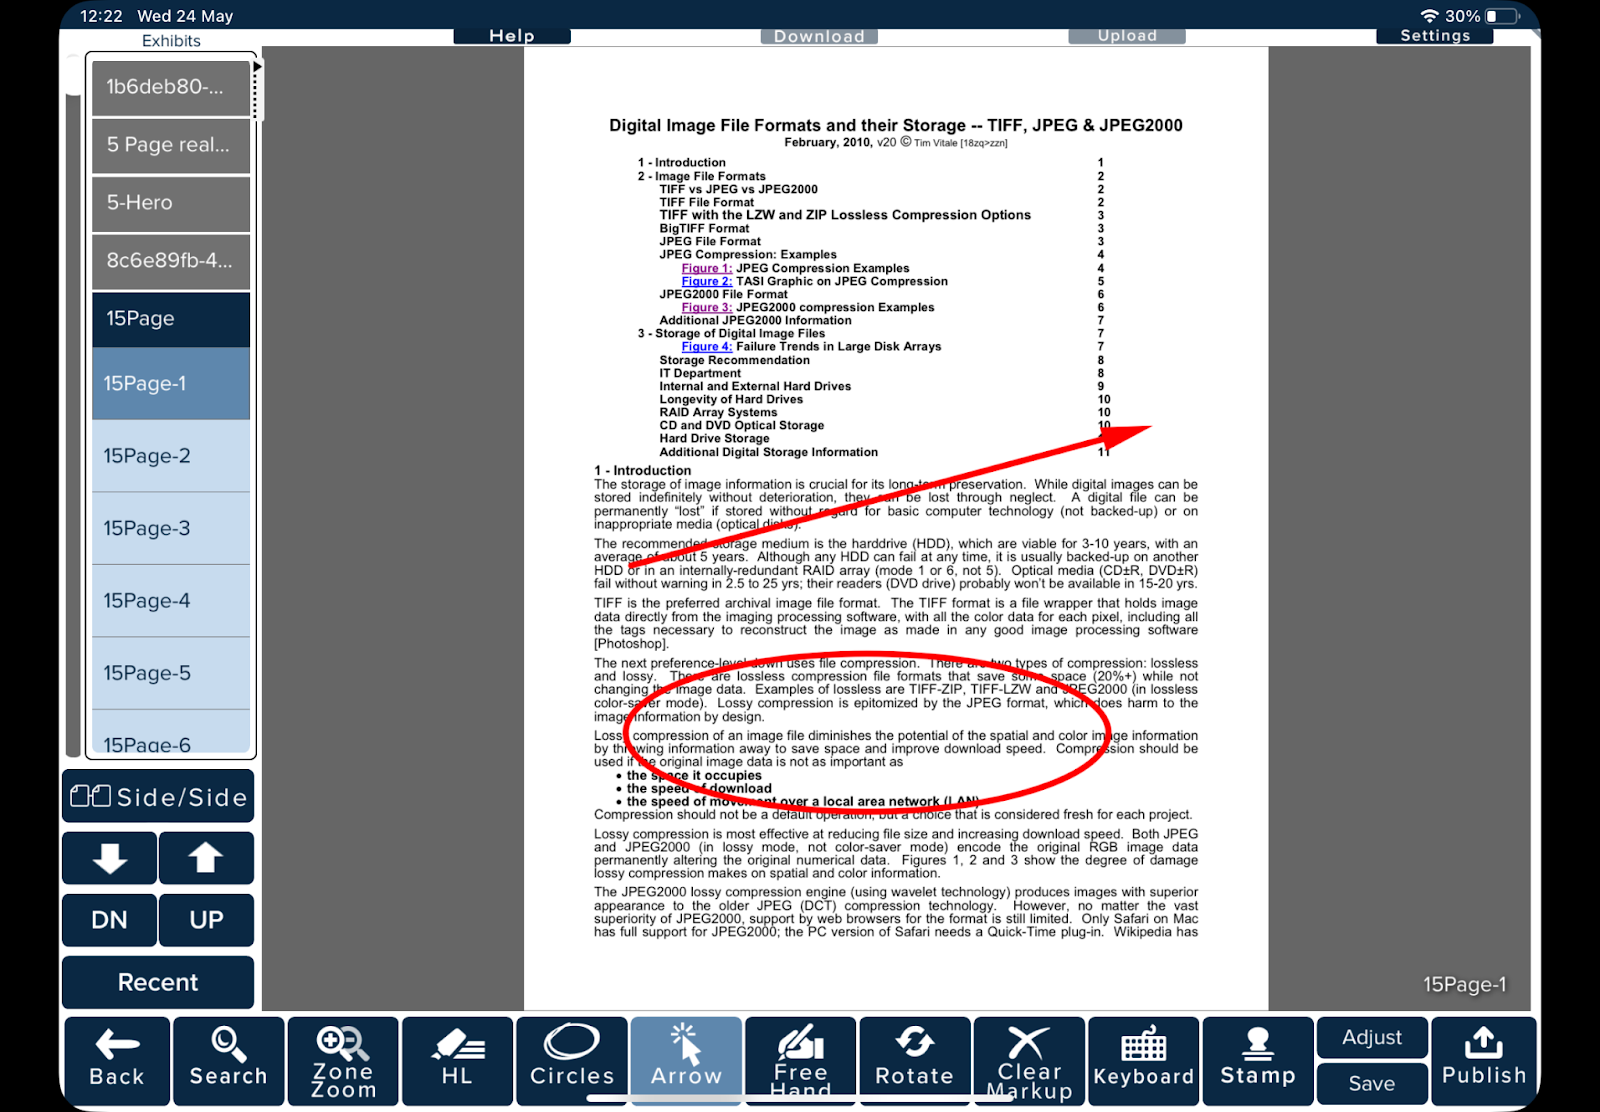
  • The bottom toolbar holds the presentation and markup tools, from Search and Zone Zoom through to Publish.

Other buttons

  • Settings opens the Settings window.
  • Notes opens a notes panel. Type a note and click Add Note. Tick This page only to attach the note to the page you are viewing.
How do I open, create, or switch cases?

Cases are kept on the Case List screen. Click CASE LISTS in the left menu to open it.

STEP 1

Open a case

On the Local Cases tab, click the case's name. JurisTrial opens the case and switches to the JURISTRIAL workspace. Each row also shows how many documents the case holds and its sync status under Sync Data.

STEP 2

Create a new case

On the Local Cases tab, click Create Case at the bottom of the screen. Type a name for the case, then choose the folder on your computer where it should be stored.

STEP 3

Switch to a different case

Click Switch Case in the top bar. The current case closes and the Case List appears, ready for you to pick another case.

You can also click Back on the case home screen. JurisTrial asks Leave this case? Click Yes to go back to the Case List or No to stay.

Other case options

  • The gear icon on a case row moves the case folder to a new location. Keep the new location on the same drive.
  • The trash icon removes the case. JurisTrial asks you to confirm first.
How do I download a case from JurisCloud?

You can bring a JurisCloud case down to your computer or iPad. On the iPad this is how you get cases into JurisTrial.

STEP 1

Open the Cloud Cases tab

Click CASE LISTS, then click the Cloud Cases tab.

STEP 2

Sign in

Fill in Server:, User: and Password:, then click Apply. The list of available cloud cases loads.

STEP 3

Download the whole case

Click Not Synced on the case's row. JurisTrial downloads the full case into your Local Cases, and a progress message appears in the lower right while it works.

STEP 4

Or download only some folders

Click the gear icon on the case's row instead. The Download Case Material window opens. Tick All Folders or tick individual folders such as Exhibits or Transcripts. To choose specific documents, click Select Files next to a folder. Then click Download.

When the download finishes, the case appears on the Local Cases tab. Click it to open it.

How do I sync my case with JurisCloud?

A case downloaded from JurisCloud stays linked to it. Syncing sends your changes up to JurisCloud and brings down changes made there.

STEP 1

Click Sync

With the case open, click Sync in the top bar, next to Switch Case. The button reads Syncing… while it works. The Sync button only appears for cases linked to JurisCloud.

STEP 2

Review the changes

If records changed since the last sync, the Review sync changes window opens. Hover over a row to see what changed. For each row, choose one of these:

  • Overwrite JT takes the JurisCloud version.
  • Overwrite JurisCloud keeps your JurisTrial version.
  • Skip leaves that record for later.

To handle many rows at once, tick them (or tick Select all) and use the buttons after Apply to selected:. Records that were deleted on one side have no default choice, so pick an action for each of them.

STEP 3

Apply

Click Apply to finish the sync. Nothing changes until you click Apply. Click Cancel Sync to stop without changing anything.

Reading the sync status on the Case List

  • Fully Synced: the case matches JurisCloud.
  • Partially Synced: there are local changes waiting to go up, newer changes in JurisCloud, or files that have not downloaded yet. Click the badge to sync.
  • Local Only: the case is not linked to JurisCloud.

Clicking a Fully Synced badge downloads the case again from JurisCloud and replaces your local copy with the cloud version. Only do this when you want the cloud version.

How do I import files into a case?

You can add PDFs, images, audio, video and synced transcripts to an open case.

STEP 1

Open the Import window

In the JURISTRIAL workspace, click Import in the folder strip. The Import Files window opens.

STEP 2

Choose destination folders

Under 1. Select Destination Folder(s), tick one or more folders, such as Exhibits, Photos, Audio/Video or Sync Transcripts. Every imported file is also added to Full Case.

STEP 3

Pick your files

Under 2. Select Files to Import, click the drop area or drag files onto it. Supported types include PDF, JPG, PNG, GIF, TIFF, MP4, MOV, MP3 and WAV. Use Import More Files to add more, or Clear All to start over.

STEP 4

Import

Click Import Files. If a file already exists in the case, the Files Already in Case window opens. Choose Skip, Overwrite or Add Copy for each file, then click Continue Import. Changing one row also sets every row below it to the same choice.

STEP 5

Check the results

The Import Complete window shows how many files were imported and lists any that failed. Click Done.

Where files end up

  • Synced deposition transcripts (.jte files) go to Sync Transcripts. Videos imported with them are filed under Audio/Video, and the import summary tells you so.
  • Other file types, such as Word documents, go to Native Files. Convert them to PDF first with FILE CONVERT if you want to present them. Native Files is not available on iPad.
How do I rename, copy, move, delete, or restore documents?
STEP 1

Select documents

Open a folder, such as Exhibits, and click Select on the action bar. Checkboxes appear in the list. Tick the documents you want, or tick the box in the Exhibit List header to select them all.

STEP 2

Choose an action

  • Rename changes a document's name.
  • Copy or Move puts documents into another folder.
  • Remove takes documents out of the current folder only. They stay in Full Case and in any other folder they belong to.
  • Delete moves documents to Trash. Deleting from Full Case removes a document from the case. Deleting from any other folder takes it out of that folder only.
  • Page # sets the number of a document's first page. Use it when a document has unnumbered intro pages. For example, enter -1 for one intro page. There is never a page 0.
  • Print and Email send the selected documents to a printer or by email.
STEP 3

Restore a deleted document

Click Trash at the bottom of the folder strip. Select the document and click Restore. It goes back to the folders it came from.

If its exhibit number has since been given to another document, the document comes back without a number. The Trash row warns you about this before you restore.

Purge in Trash permanently removes a document and its markup from this computer, and it cannot be undone. On a synced case the JurisCloud copy is not affected, so the document can come back at the next sync. Remove it in JurisCloud as well if it should be gone for good.

How do I change JurisTrial settings?

Click Settings at the top of the JurisTrial workspace. Settings are grouped into tabs. Click Save Settings when you are done, or Close to leave without saving.

  • General
    • Import Files opens the import window, and Open JurisCloud opens the Cloud Cases list.
    • Exhibit lookup decides what happens when you type an exhibit number. Exact DocID only (safest) opens only an exact match. Type-ahead list shows a list to choose from when more than one exhibit matches.
    • Publish style chooses how the courtroom screen works: In-viewer (new), which is the default, or Classic full-screen.
    • Idle screen logo sets what the courtroom screen shows when nothing is published. Click Logo… to use your firm's logo, Reset to go back to the default, and adjust the Size and Fade sliders.
    • An information bar shows the version, document and page counts, and the last sync time.
  • CaseInfo: case, court, firm, opposing counsel and staff details for the case.
  • Admin: Go to Web Server (JurisCloud).
  • Exhibits: Exhibit list chooses Page View — pages under the document or Document View — documents only. Display Exhibit ID and Word Wrap Document ID's control how names appear in the list.
  • Transcripts: Font Size and Line Spacing for transcript text.
  • Audio/Video: Media Playback Speed.
  • Log: View Log, Print Log, Email Log and Delete Log for the application log.

JurisTrial — Presenting

8 articles
How do I find and open an exhibit quickly?
  • From the list: open Exhibits (or any folder) and click an exhibit in the Exhibit List. In Page View, click a page row to go straight to that page.
  • Next or previous: use UP and DN under the list to move between exhibits, and the arrow buttons to move between pages.
  • By number: click Keyboard on the bottom toolbar to open Go to Exhibit. Choose Exhibit or Page, type a number (for example 5, or 5-3 for exhibit 5, page 3) and click Go. You can also type the exhibit number on your keyboard while viewing documents and press Enter.
  • Go back: click Recent to see the exhibits you showed most recently and jump back to one. The Recents folder lists recently opened documents.

To choose how typed numbers are matched, go to Settings > General > Exhibit lookup.

How do I present an exhibit on the courtroom screen?

Publishing sends what you are showing to the courtroom display, such as a projector, TV or second monitor, while you keep control on your own screen.

STEP 1

Connect the courtroom display

On Windows or Mac, connect a second monitor or projector before you publish. JurisTrial shows the courtroom view full screen on that second display. On iPad, connect to the courtroom display with AirPlay (for example, an Apple TV).

STEP 2

Open the exhibit

Open the exhibit you want to show and get it ready. For example, go to the right page.

STEP 3

Click Publish

Click the green Publish button on the bottom toolbar. The courtroom screen now mirrors your viewer, including zoom and markup, and the button turns red and reads UnPublish.

STEP 4

Use Freeze and Blackout while presenting

Three extra buttons appear on the toolbar while you are publishing:

  • Freeze keeps the courtroom on the current view while you work on something else. It changes to UnFreeze, and a FROZEN — jury holds banner appears on your screen. Click UnFreeze to send what you are showing now.
  • Return to Frozen brings your own screen back to the view the courtroom is holding.
  • Blackout turns the courtroom screen black at once. Click Blackout-OFF to bring the picture back.
STEP 5

Stop presenting

Click UnPublish. The courtroom screen goes back to its idle screen, which shows a logo that you can change in Settings > General > Idle screen logo.

If no second display is found, JurisTrial shows a message and publishes in the current window only. To use the older full-screen presentation window instead, change Publish style to Classic full-screen in Settings > General.

How do I mark up an exhibit?

The markup tools are on the bottom toolbar. Markup shows on the courtroom screen too when you are publishing.

STEP 1

Pick a tool

Click one of these tools:

  • HL highlights.
  • Circles draws circles.
  • Arrow draws arrows.
  • Free Hand draws freely.
  • Text adds typed text.
  • Eraser removes markup.

Click the same tool again to turn it off.

STEP 2

Draw on the page

Drag on the document to draw. For Text, click where the text should go and type it.

STEP 3

Change color, thickness or shape

Press and hold a tool button to open its options. You can pick a color, a line thickness and, for most tools, an opacity. Press and hold Circles to switch it to Box, or Arrow to switch it to Line. JurisTrial remembers your choices for each tool.

STEP 4

Undo or remove markup

  • Click Clear Markup to remove the last mark you made.
  • Click Redo to bring it back.
  • Press and hold Clear Markup for Remove All, Restore All and Select Annotation. Select Annotation lets you pick one mark and delete it with Clear Markup.
STEP 5

Save

Click Save to save the markup on the page. JurisTrial also saves a page's markup when you move to another page.

Rotate turns the current page if it was scanned sideways.

How do I use Zone Zoom to enlarge part of a page?

Zone Zoom pops out an enlarged copy of any part of a page, such as a signature or a key paragraph.

STEP 1

Turn on Zone Zoom

With the exhibit open, click Zone Zoom on the bottom toolbar.

STEP 2

Draw a box

Drag a box around the area you want to enlarge. A sharp, enlarged pop-out of that area appears.

STEP 3

Adjust the pop-out

Drag the pop-out to move it, and resize it from its corners. The edges of the pop-out let you show a little more above, below or to either side. You can make more than one pop-out, even from different pages.

STEP 4

Close it

Click the × on the pop-out, double-click it, or press Esc.

If you are publishing, the pop-outs appear on the courtroom screen as well.

How do I redact an exhibit?

Redaction works in two stages. First you draw redaction boxes, which you can still change. Then you burn them in, which permanently removes the covered content from a new copy of the document.

STEP 1

Draw redaction boxes

Open the exhibit and click Redact on the bottom toolbar. Drag a box over each area to hide, on as many pages as you need.

STEP 2

Review what is pending

Press and hold the Redact button, or click Burn Redactions on the action bar. The Pending redactions list shows each page that has redactions. Click a page to jump to it and check your boxes.

STEP 3

Apply the redactions

Click Apply redactions…. The button changes to Confirm — this cannot be undone. Click it again to burn the redactions in.

If other documents also have pending redactions, you can burn them all at once with Apply to all … documents…. If you ticked documents with Select first, only those are included.

What happens to the exhibit number

Applying never changes your original. JurisTrial creates a redacted copy, and the copy takes the exhibit number (for example, 3), so it is what opens when you type that number. The unredacted original is kept and renumbered with -NR (for example, 3-NR). Be careful not to publish the -NR version by mistake.

How do I stamp an exhibit or mark it Marked or Admitted?

Add an exhibit stamp

STEP 1

Click Stamp

With the exhibit open, click Stamp on the bottom toolbar. A stamp appears on the page with the exhibit number filled in. You can add up to three more lines of text.

STEP 2

Adjust the stamp

Drag the stamp where you want it. Use Size and Rotate to fit it, and pick a color: yellow, pink, green or blue.

STEP 3

Save the stamp

Click Save on the stamp toolbar, or Cancel to discard it. To remove a saved stamp, use Clear Markup.

Record Marked or Admitted status

STEP 4

Choose the exhibit or the page

Select the exhibit in the Exhibit List to set the status for the whole exhibit. In Page View, select a single page row to set the status for that page only.

STEP 5

Click Marked or Admitted

Click Marked or Admitted on the bottom toolbar. JurisTrial records today's date, shows a dated badge on the document, and adds a green bar beside the exhibit in the list. A solid bar means admitted, an outline means marked, and a half bar means only some pages are admitted. Click the same button again to clear the status.

How do I show two exhibits side by side?
STEP 1

Turn on Side/Side

Open the first exhibit, then click Side/Side under the Exhibit List. The viewer splits into two panes.

STEP 2

Choose the active pane

Click a pane to make it active. The active pane has a blue border and a small blue arrow at the top. The next exhibit you open from the list goes into the active pane, and the markup tools work on that pane.

STEP 3

Arrange the panes

  • Drag the divider to resize the panes.
  • Click the arrow on the left edge to step the left pane through half, larger and full width.
  • Click Swap Panes to swap the two exhibits.
STEP 4

Present it

Click Publish to show both exhibits side by side on the courtroom screen.

STEP 5

Turn it off

Click Side/Side again to go back to a single exhibit.

How do I search my exhibits and transcripts?
STEP 1

Open Case Search

Click Search in the folder strip or on the bottom toolbar.

STEP 2

Pick a scope

Under SCOPE, choose one of these:

  • Current Document
  • Multiple Documents (click Pick… to choose them)
  • Folders (click Pick… to choose them)
  • Entire Case
STEP 3

Type your search

Under QUERY, type what you are looking for and click Search. You can use AND, OR, NOT (or a minus sign before a word), "exact phrases" in quotes, and the wildcards * and ?.

Options include Case-sensitive, Whole word, and Sync Transcripts, which includes synced deposition transcripts in the search.

STEP 4

Narrow the results (optional)

Open FILTERS to limit results by file type, date range, exhibit number range, or annotated documents only. For transcripts you can search questions only (Q only) or answers only (A only), and choose a Witness.

STEP 5

Open a result

Click a result. A document opens at the matching page with your search words highlighted. A transcript opens at the matching page and line. Use Sort: and Per page: to organize long result lists.

Click + Save Current under SAVED SEARCHES to keep a search you will run again. Recent ▾ lists your recent searches.

JurisTrial — Depositions & Clips

4 articles
How do I play a deposition video with its synced transcript?

A synced transcript (.jte file) plays the deposition video with the transcript scrolling along.

STEP 1

Choose the deposition

Click Sync Transcripts in the folder strip. In the Select Deposition list, click the deposition's name.

STEP 2

Play

Click Play on the bottom toolbar. The transcript scrolls with the video and the current line is highlighted. Click any transcript line to move the video to that point. The link button under the transcript turns sync scrolling on and off.

STEP 3

Move around

  • Start and End jump to the beginning or end.
  • -1s and +1s step back or forward one second.
  • Mute turns the sound off and on.
  • To go to a page and line, type it in the Page:Line box (for example, 50 or 50:20) and click Go.
  • To search the transcript, type in the search box and use the ◀ ▶ buttons to move between matches.
STEP 4

Change the layout

  • Video/Text switches between video and text together, Text Only, and Video Only.
  • 5 Lines switches how many transcript lines are shown (5, 10 or 3).
  • Drag the handle below the video to resize it.

If the video is missing

If you see No linked video in this case, click Resolve Video…. There are two tabs:

  • Case Videos: match each video the transcript expects to a video already in the case, then click Save & Use Videos.
  • Import Sync Videos: click + Add Video Files to pick the video files, then click Import & Continue.
How do I create a clip from a deposition in JurisTrial?

You can make clips right on the Sync Transcripts screen by clicking transcript lines. A clip can have several segments. Only synced lines can be used.

STEP 1

Start clip mode

Open the deposition and click Create Clip under the left panel. The editor bar under the transcript reads Click a transcript line to set START.

STEP 2

Mark the start and stop lines

Click the first line of the testimony, which marks START. Then click the last line, which marks STOP. The stop line must be the same line as the start or below it. The whole stop line is included.

STEP 3

Add more segments (optional)

Keep clicking START and STOP pairs to add more segments to the same clip. Each segment appears as a chip. Right-click a chip to edit or delete it.

STEP 4

Fine-tune the timing (optional)

  1. Use [<1], [<.1], [.1>] and [1>] to move the point by one second or a tenth of a second. Each move plays a short preview, and ▶ Play previews it again.
  2. Click SAVE START, adjust the stop point the same way, then click SAVE STOP.
STEP 5

Save and name the clip

Click Save Clip. In Save Clip - Name Your Clip, choose a Naming Method:

  • Custom Name
  • Start/End PageLine
  • Consecutive (numbered)

You can add a Prefix or Suffix. Click Save Clip.

Objection lines (for example OBJECTION, SUSTAINED or OVERRULED) are cut out of the clip automatically when you save. The clip may therefore show more segments than you marked.

Click Discard to clear what you have marked, or click Create Clip again to leave clip mode.

How do I play my clips and print a clip list?

Saved clips are listed under Clips in the left panel of the Sync Transcripts screen, sorted by name.

STEP 1

Cue a clip

Click a clip's name to expand it, then click ▶ Full Clip. The clip is cued, paused, at its first segment, and the transcript shows only the clip's lines.

STEP 2

Play it

Click Play. All the clip's segments play back to back. Use Prev Seg, Seg Start, Seg End and Next Seg to move between segments. To start from a later segment, click that segment's row.

STEP 3

Edit or delete a clip

Right-click a clip for Edit Name, Edit Clip, Add Segment, Delete and Clip List Report.

STEP 4

Print or email a clip list

Click Clip List under the left panel. The Clip List Report window opens. Choose Summary for the page:line ranges and times, or Detailed to include the transcript text. Then click Copy, Print or Email.

To build clip lists in a set order, combine clips, or export clips as video files, use CLIP CREATOR in the left menu.
How do I play a deposition or clip for the jury?
STEP 1

Cue the testimony

Open the deposition on the Sync Transcripts screen and move to the right point, or cue a clip with ▶ Full Clip.
STEP 2

Publish

Click Publish on the bottom toolbar. The courtroom screen shows the video with the transcript text scrolling beneath it. The button changes to UnPublish. Publishing always starts in the video-and-text layout.

STEP 3

Play

Click Play. Freeze, Return to Frozen and Blackout appear to the left of Play and work just as they do for exhibits.

STEP 4

Adjust what the jury sees

  • 5 Lines sets how many transcript lines appear: 3, 5 or 10.
  • Jury Text Dark / Jury Text Light switches the courtroom transcript between light text on black and dark text on white.
STEP 5

Show an exhibit alongside the video

Click Side/Side to open an exhibit pane next to the video. Type an exhibit number and press Enter, or use Open ▾. Clicking the exhibit pane normally pauses the video. Turn on Continuous Play if you want the video to keep playing while you work in the exhibit pane.

Click UnPublish when you are finished.

JurisTrial — Tools

7 articles
How do I convert documents, images, or emails to PDF (FILE CONVERT)?

This tool is in the left menu of the Windows and Mac apps. It is not available on iPad.

STEP 1

Open the converter

Click FILE CONVERT in the left menu.

STEP 2

Add files

Click 📂 Import Files or 📁 Import Folder, or drag files onto the list. Tick Recurse Subdirectories to include subfolders.

Supported files:

  • Word, Excel and PowerPoint files
  • OpenDocument files
  • RTF, TXT and CSV files
  • Images: PNG, JPG, GIF, BMP, TIFF and WEBP
  • Emails: .eml and .msg. Email attachments are converted too.
STEP 3

Choose where to save

Under Output Destination:, click Browse... or a shortcut such as 🖥️ Desktop, 📄 Documents or 📁 Case Folder.

STEP 4

Set options (optional)

  • Quality: is High, Normal or Draft.
  • The Naming: button lets you add prefixes, suffixes, dates, or file or page-based numbering.
  • For emails, choose w/ Attachments or w/o Attachments and how attachments are named.
  • Mirror Folder Structure keeps your folder layout in the output.
STEP 5

Convert

Click 🔄 Convert Selected for ticked files or ⚡ Convert All for everything. Finished files appear under Converted Files. Click 📂 Open to see them.

On a Mac, converting Office documents needs LibreOffice installed. Images and emails convert without it. 📋 Batch History lists past conversions and can export them as a CSV file.

How do I edit PDF pages or add Bates numbers (PDF EDITOR)?

This tool is in the left menu of the Windows and Mac apps. It is not available on iPad.

STEP 1

Load PDFs

Click PDF EDITOR. Click Import Files to open PDFs from your computer, or Add from Case to choose exhibits from the open case, then click Add Selected.

STEP 2

Organize pages

On the Organize tab, use these buttons:

  • Rotate
  • Insert
  • Extract
  • Replace
  • Delete
  • Merge
  • Split
  • Move

Tick Overwrite to replace the file or Save New to make a copy, then click Save. When you work on case documents, split and merged files are added to the case.

STEP 3

Add Bates numbers, headers or footers

On the Stamp tab:

  1. Set Prefix:, Start Number:, Number of digits: and the header or footer text. Tick # Stamp where the number should go.
  2. Click Bates Preview to check it.
  3. Click Apply Header/Footer.
STEP 4

Other tabs

  • File Rename renames many files at once.
  • Watermark adds text across pages. Click Apply Watermark, then Save.
  • OCR makes scanned PDFs searchable. Click Start. OCR needs a separate OCR component on your computer, and the app shows install steps if it is missing.
  • Print prints the loaded files or zips them.
How do I convert video or audio files (MEDIA CONVERT)?

This tool is in the left menu of the Windows and Mac apps. It is not available on iPad.

STEP 1

Add media

Click MEDIA CONVERT, then click + Add Files or drag files in. Most common video and audio formats are accepted, including MP4, AVI, MOV, MKV, WMV, MPG, VOB, MTS, MP3, WAV and WMA.

STEP 2

Choose the output

Pick an Output Format:. Video options are MP4 (H.264), AVI, MOV and MKV. Audio-only options are MP3 and WAV. You can also set Resolution: and Quality:, and choose a folder with Save to:.

STEP 3

Merge (optional)

Tick Merge into one file to join two or more files into one.

STEP 4

Convert

Click Convert All. Each file shows its progress, and Overall Progress tracks the whole batch. Click Cancel to stop.

MP4 (H.264) plays everywhere, including in JurisTrial on iPad, so it is a good choice for courtroom video.

How do I convert a synced deposition file to JTE (SYNC CONVERT)?

This tool is in the left menu of the Windows and Mac apps. It is not available on iPad.

STEP 1

Import the synced file

Click SYNC CONVERT, then click 📂 Import File and choose a .jte, .cms or .mdb file. Files that contain several transcripts are split into separate entries. Importing .cms and .mdb files works in the Windows app only.

STEP 2

Check the details

Review DEPONENT INFO (Deponent Name:, Case Name:, Date:, Volume:), the MEDIA FILES list and the CLIPS table. Use the ✎ buttons to fix anything.

STEP 3

Rename clips (optional)

Click ✎ Rename Clips to apply a naming pattern to all clips, then click Apply to All Clips. 📋 Export Report makes a PDF clip report.

STEP 4

Export

Under EXPORT, choose JTE, enter an Output Name:, pick an Output Folder: and click 📤 EXPORT. Import the finished .jte into your case to play it on the Sync Transcripts screen.

How do I sync a transcript to deposition video (TRANSCRIPT SYNC)?

This tool is in the left menu of the Windows and Mac apps. It is not available on iPad.

STEP 1

Load the transcript and media

Click TRANSCRIPT SYNC. Click Import Text, JTE or JST File to load the transcript, then Import Media Files to load the deposition video or audio.

STEP 2

Sync automatically

Choose a Level of Service and click Auto Sync. When asked, pick a folder for the results. Your media is sent to an online service to be timed, so you need an internet connection. The cost estimate shown in the tool is charged per hour of media. When syncing finishes, JurisTrial shows how many lines were synced and the confidence.

STEP 3

Or sync by hand

Click the first spoken line, then Set First Line, or click Manual Sync. Play the media and press the SPACEBAR as each line is spoken to stamp its time.

STEP 4

Review the result

Click Start QC Review. Step through with ◀ Prev and Next ▶, and use Flag Line or Approve Line. Click Mark QC Complete when done.

STEP 5

Export the synced transcript

Under Export Options, enter an Export Filename:, keep .jte ticked, and click Export Selected. Use Save or Save As to save your work as a project and finish later.

Click ❓ Help for the keyboard shortcuts.

How do I build and export deposition clips (CLIP CREATOR)?

This tool is in the left menu of the Windows and Mac apps. It is not available on iPad.

Clip Creator is the full workshop for deposition clips. You can put clips in order, rename them in bulk, combine them, and export them as video.

STEP 1

Load the deposition

Click CLIP CREATOR. In the Transcript box, click + Import and choose the .jte file. If the file already has clips, choose Import All or Skip. Then click + Import in the Video Files box and choose the deposition video.

STEP 2

Mark the clip

Click a transcript line to set the start of a segment, then a later line to set its stop. Add more segments the same way. To fine-tune a segment:

  1. Click its Start or Stop box.
  2. Adjust it with [<1], [<.1], [.1>] and [1>].
  3. Click Save Start, then Save Stop.
STEP 3

Save the clip

Click 👉 Save Clip. Choose a naming method, and tick Auto # if you want automatic numbering. Then click Save Clip.

STEP 4

Build your clip list

  • Drag ⋮⋮ to reorder clips, or use Move Clips and click Save Order.
  • Click Play on a clip to watch it.
  • Rename Clips adds or removes a numbered prefix or suffix on many clips at once. The numbers follow the list order.
  • To join clips, tick two or more and click Combine Clips.
STEP 5

Export

Tick the clips and click Export Selected. Choose Video Clip Only or Video Clip with Closed Captions, set the caption and file-naming options, then click Export and choose a folder. Each clip is saved as an MP4.

Other export options:

  • Export .jte File saves all clips in a new .jte file that you can import into your case.
  • Export Reports creates PDF Detail and Summary reports.

Click Save in the Clips panel to save your work as a project, and Load to reopen it.

How do I send files to the InTrial app on an iPad (IPAD IMPORT)?

IPAD IMPORT copies files from your PC into a case in the InTrial Pro app on an iPad connected by USB. It works in the Windows app only.

STEP 1

Connect the iPad

Plug the iPad into your PC and click IPAD IMPORT. Click the iPad in the Device box. Click 🔄 if it does not appear.

STEP 2

Choose the case

In the App box, choose InTrial Pro (Local). Pick a case in the Case List box and click Open Case.

STEP 3

Choose a folder

Click the target folder in the Folders list.

STEP 4

Add files and import

Drag files from File Explorer onto the window. Then click ⬆️ Import and watch the Progress bar and Transfer Log. Click Disconnect when you are done.

Classic: JurisTrial for iPad & JurisTools

Help for the earlier iPad app, JurisTools, and classic JurisCloud.

General

1 article
JurisTrial Installation Process

Follow these steps to install JurisTrial on your iPad device:

  1. Open the App Store on your iPad.
  2. Search for JurisTrial in the search bar.
  3. Tap Get (or the cloud icon if previously downloaded) to begin the download.
  4. Once installed, tap Open to launch JurisTrial.
  5. Sign in with your JurisCloud credentials (email and password).
  6. If you have a subscription code, enter it when prompted to unlock the application.
  7. Accept any permissions requests (camera, storage, network) to enable full functionality.
  8. You are now ready to use JurisTrial. Proceed to the Overview section to get started.

If you encounter any issues during installation, please contact help@islandlegaltech.com.

Screenshots · 8
JurisTrial Installation Process - image 1JurisTrial Installation Process - image 2JurisTrial Installation Process - image 3JurisTrial Installation Process - image 4JurisTrial Installation Process - image 5JurisTrial Installation Process - image 6JurisTrial Installation Process - image 7JurisTrial Installation Process - image 8

Overview

1 article
Where do I start?

Welcome to Island Legal Technologies. Here is your complete onboarding checklist:

  1. Visit the JurisCloud Website — Navigate to your JurisCloud portal URL provided during account setup.
  2. Get to know JurisCloud — JurisCloud is the central management hub for cases, users, and subscriptions.
  3. Sign up for an Account — Create your admin account from the JurisCloud sign-up page.
  4. Access the JurisCloud Dashboard — Log in and explore the dashboard overview including case storage information.
  5. Set Up Administrators and Invite Team Members — Add co-workers and assign admin roles as needed.
  6. Explore Case Dashboard and Storage Information — (Upcoming feature)
  7. Create and Manage Cases on JurisCloud — (Upcoming feature)
  8. Familiarize Yourself with JurisTools — JurisTools is the desktop companion app for building and managing case data.
  9. Explore JurisTools Functionalities — Import/export case data, create cases, and prepare data for JurisTrial.
  10. Understand JurisTrial iPad Application Purpose and Features — JurisTrial is your in-courtroom presentation tool on iPad.
  11. Explore JurisTrial Functionality — Markup, search, deposition sync, and live presentation tools.
  12. Understand the Interconnectedness — JurisCloud manages accounts; JurisTools prepares data; JurisTrial presents it in court.
Screenshots · 8
Where do I start - image 1Where do I start - image 2Where do I start - image 3Where do I start - image 4Where do I start - image 5Where do I start - image 6Where do I start - image 7Where do I start - image 8

Account

4 articles
Subscription Timeout Period for JurisTrial & JurisTools

Subscription Timeout Period for JurisTrial

JurisTrial subscriptions are tied to a specific device and subscription code. The following applies to subscription timeouts:

  1. If your subscription expires, JurisTrial will display a prompt indicating the subscription has timed out.
  2. Contact your JurisCloud admin to renew or reassign a subscription code.
  3. Once a new code is provided, open JurisTrial and enter the code when prompted to restore full access.
  4. Case data is retained locally on the device during a timeout period — it is not deleted.

Subscription Timeout Period for JurisTools

  1. JurisTools subscription is managed via JurisCloud and linked to your admin account.
  2. If the subscription lapses, JurisTools will enter a read-only mode or prompt for renewal.
  3. Renew through JurisCloud admin panel under Subscriptions.
  4. After renewal confirmation, restart JurisTools and log in again to restore full functionality.
Screenshots · 8
Subscription Timeout Period - image 1Subscription Timeout Period - image 2Subscription Timeout Period - image 3Subscription Timeout Period - image 4Subscription Timeout Period - image 5Subscription Timeout Period - image 6Subscription Timeout Period - image 7Subscription Timeout Period - image 8
How do I create a new account?

Process Flow for Account Creation

  1. The account owner creates an admin account on JurisCloud.
  2. Using the admin account, the owner creates accounts for co-workers and invites them.
  3. Once co-worker accounts are created, assign a global admin role as needed.
STEP 1

Create an Admin Account on JurisCloud

Login into JurisCloud:

  1. Navigate to the JurisCloud login page.
  2. Enter your email address and password.
  3. Click Sign In.
  4. Upon first login, complete the profile setup wizard.

Forgot Password:

  1. Click Forgot Password on the login page.
  2. Enter your registered email address.
  3. Check your email for a reset link and follow the instructions.
STEP 2

Invite a Co-Worker

Using the admin account, create accounts for co-workers and invite them to join the system. See How do I invite co-workers? for detailed steps.

STEP 3

Assign Global Admin Role

Once co-worker accounts are created, assign a global admin role to grant full management permissions alongside the owner.

Screenshots · 8
How do I create a new account - image 1How do I create a new account - image 2How do I create a new account - image 3How do I create a new account - image 4How do I create a new account - image 5How do I create a new account - image 6How do I create a new account - image 7How do I create a new account - image 8
How do I invite co-workers?
STEP 1

Create a Co-Worker Account & Invite Them

Using the admin account, the owner can create accounts for co-workers and invite them:

  1. Log in to JurisCloud with your admin credentials.
  2. Navigate to User Management in the sidebar.
  3. Click the Invite User button.
  4. Enter the co-worker's name, email address, and phone number.
  5. Click Send Invitation. The system will send an email with login instructions.
  6. Confirm the invitation was sent successfully.
STEP 2

Assign Global Admin Role

Once the co-worker confirms their account, you may assign them a global admin role:

  1. In User Management, locate the co-worker's account.
  2. Click on their name to open account details.
  3. Under Role, select Global Admin.
  4. Save the changes. The co-worker now has full admin permissions.
Screenshots · 8
How do I invite co-workers - image 1How do I invite co-workers - image 2How do I invite co-workers - image 3How do I invite co-workers - image 4How do I invite co-workers - image 5How do I invite co-workers - image 6How do I invite co-workers - image 7How do I invite co-workers - image 8
How do I add a co-worker to the solution?

Feature: Invite User  |  Performed by: Admin

Admin Activity Flow

  1. Admin logs in with username & password (admin rights required).
  2. The dashboard sidebar contains the User Management section.
  3. Inside User Management, click the Invite User button.
  4. Enter the user's name, email, and phone number, then submit.
  5. The system automatically sends an email with login codes to the new user.

User Activity Flow

The invited user will receive an invitation email from the system:

  1. The invitation email contains a joining link — click it to be redirected to the setup page.
  2. Enter the required details and set a password for the account.
  3. The user can now log in using their invited email and chosen password.
Screenshots · 3
How do I add a co-worker to the solution - image 1How do I add a co-worker to the solution - image 2How do I add a co-worker to the solution - image 3

Subscriptions

1 article
How do I purchase a subscription for a second set of devices?

Feature: Purchase a subscription for a second set of devices  |  Performed by: Admin

Admin Activity Flow

  1. Log in to JurisCloud with admin credentials.
  2. Navigate to the Subscriptions section in the dashboard.
  3. Select Purchase Additional Subscription.
  4. Choose the number of devices / subscription tier required.
  5. Complete the payment process.
  6. Once confirmed, a new subscription code will be generated and available under your account.
  7. Share the subscription code with the JurisTrial app user on the target device.

JurisTrial App User — Unlock with Subscription Code

To unlock JurisTrial after receiving the subscription code:

  1. Open JurisTrial on your iPad.
  2. When prompted for a subscription code, enter the code provided by your admin.
  3. Tap Activate.
  4. JurisTrial will verify the code and unlock full functionality.
Screenshots · 6
How do I purchase a subscription for a second set of devices - image 1How do I purchase a subscription for a second set of devices - image 2How do I purchase a subscription for a second set of devices - image 3How do I purchase a subscription for a second set of devices - image 4How do I purchase a subscription for a second set of devices - image 5How do I purchase a subscription for a second set of devices - image 6

Case

1 article
How do I create a new Case?

Create New Case Using JurisTools

In JurisTools, the Case Builder section empowers users to create new cases effortlessly:

  1. Open JurisTools on your computer and log in.
  2. From the main menu, navigate to Case Builder.
  3. Click New Case.
  4. Enter the case name, description, and any relevant metadata.
  5. Click Create to save the new case.

Export Case to JurisTrial Application

  1. In JurisTools, open the case you wish to export.
  2. Go to File > Export Case.
  3. Select Export to JurisTrial.
  4. Choose your export destination (USB, local folder, or direct Wi-Fi transfer).
  5. Confirm the export and wait for completion.

Import Case to JurisTrial Application

  1. On your iPad, open JurisTrial.
  2. Tap Import Case from the main screen.
  3. Choose the import source (iTunes, USB, Wi-Fi).
  4. Select the exported case file and tap Import.
  5. The case will appear in your JurisTrial case list.

Create New Case Using JurisTrial iPad App

  1. Open JurisTrial on your iPad.
  2. From the home screen, tap New Case.
  3. Enter the case name and any required details.
  4. Tap Create to save.
  5. The new case is now available in your case list and ready for data import.
Screenshots · 1
How do I create a new Case?

Upload

2 articles
How to use JurisTools for import/export data to/from JurisTrial

Export Case to JurisTrial Application

  1. Open JurisTools and select the target case.
  2. Go to File > Export Case.
  3. Choose Export to JurisTrial from the menu.
  4. Select your transfer method: USB cable, local Wi-Fi, or save to folder.
  5. Confirm and wait for the export to complete. A success message will appear.

Import Case From JurisTrial Application

  1. In JurisTools, go to File > Import Case.
  2. Select Import from JurisTrial.
  3. Connect your iPad via USB or ensure both devices are on the same Wi-Fi network.
  4. Choose the case to import and confirm.

Export Case Data

  1. Open the case in JurisTools.
  2. Navigate to Data > Export Data.
  3. Select the data types to export (exhibits, transcripts, markups).
  4. Choose export format and destination folder.
  5. Click Export and confirm completion.

Import Case Data

  1. In JurisTools, open the target case.
  2. Navigate to Data > Import Data.
  3. Browse to the data files on your computer.
  4. Select the files and click Import.
  5. Verify imported data appears correctly in the case.
Screenshots · 1
How to use JurisTools for import/export data to/from JurisTrial
What options are there to upload data to JurisTrial (iPad app)?

After creating a new case, you can import data from various sources:

Import from iPad Storage / iTunes

iTunes enables seamless file transfer between a computer and your iPad:

  1. Connect your iPad to your computer via USB cable.
  2. Open iTunes (Mac/Windows) or Finder (macOS Catalina+).
  3. Select your iPad device, then navigate to File Sharing.
  4. Select JurisTrial from the app list.
  5. Drag and drop files into the JurisTrial documents area, or click Add File.
  6. Open JurisTrial on your iPad and import from iPad Storage.

Import from Flash Drive (SanDisk)

  1. Connect a compatible SanDisk flash drive to your iPad via the Lightning or USB-C adapter.
  2. In JurisTrial, tap Import > Flash Drive and browse to your files.
  3. Select the files and tap Import to add them to your case.

Import from Dropbox

  1. Ensure Dropbox is installed on your iPad and you are logged in.
  2. In JurisTrial, tap Import > Dropbox.
  3. Authorize JurisTrial to access your Dropbox if prompted.
  4. Browse your Dropbox folders and select the files to import.
  5. Tap Import. Files are downloaded and added to the case.

Import from Photos / Videos

Photos:

  1. In JurisTrial, tap Import > Photos.
  2. Grant permission to access your photo library if prompted.
  3. Select photos and tap Import.

Videos:

  1. In JurisTrial, tap Import > Videos.
  2. Browse your video library, select files, and tap Import.

Import from Email

To import attachments from email into JurisTrial Pro:

  1. Open the email with the attachment in your iPad's Mail app.
  2. Tap and hold the attachment, then tap Share.
  3. Select Open in JurisTrial from the share sheet.
  4. Choose the target case and tap Import.
Screenshots · 1
What options are there to upload data to JurisTrial (iPad app)?

Depositions

1 article
How do I upload depositions with synchronized transcripts?

To upload depositions with synchronized transcripts, the process involves creating a transcript file, converting the video, transferring data, and synchronizing.

STEP 1

Create a Transcript File

  1. Obtain the deposition transcript in a supported format (e.g., .ptx, .txt, or .xml).
  2. If necessary, convert the transcript using a compatible transcript editor.
  3. Save the transcript file to an accessible location on your computer.
STEP 2

Convert the Video File into MP4 Format

  1. Use a video conversion tool (e.g., HandBrake, FFmpeg) to convert the deposition video to MP4 format.
  2. Ensure the video resolution is compatible with JurisTrial (720p or 1080p recommended).
  3. Save the MP4 file to the same folder as your transcript file.
STEP 3

Move Transcript Data into JurisTrial

  1. Connect your iPad to your computer via USB.
  2. Using iTunes / Finder File Sharing, copy both the MP4 video and transcript file into JurisTrial's documents folder.
  3. Alternatively, transfer via Wi-Fi if your setup supports it.
STEP 4

Sync Transcript Data

  1. Open JurisTrial on your iPad.
  2. Navigate to the Depositions section within your case.
  3. Tap Add Deposition and select the video file.
  4. When prompted, select the matching transcript file.
  5. Tap Sync — JurisTrial will link the transcript to the video timeline.
  6. Review the synchronized deposition and verify alignment.
Screenshots · 8
How do I upload depositions with synchronized transcripts - image 1How do I upload depositions with synchronized transcripts - image 2How do I upload depositions with synchronized transcripts - image 3How do I upload depositions with synchronized transcripts - image 4How do I upload depositions with synchronized transcripts - image 5How do I upload depositions with synchronized transcripts - image 6How do I upload depositions with synchronized transcripts - image 7How do I upload depositions with synchronized transcripts - image 8

Searching

1 article
How do I search for items to prepare for my case?

JurisTrial provides multiple search methods. For accurate results, PDFs must contain embedded (searchable) text.

Searching Within the Current File

  1. Open the document in JurisTrial.
  2. Tap the Search icon (magnifying glass) in the toolbar.
  3. Type your search term in the search field.
  4. Results will be highlighted within the current document.

Searching Across Various Folders

  1. From the case file browser, tap the Search icon.
  2. Enter your search term — JurisTrial will scan across all folders in the case.
  3. Results are listed by file; tap any result to navigate directly to it.

Full-Text Word Search

  1. Tap Search > Full Text from the toolbar.
  2. Enter the keyword or phrase.
  3. All matching occurrences across the entire case are returned.

Reindex Exhibits

  1. Go to Settings > Case Settings in JurisTrial.
  2. Tap Reindex to rebuild the search index for all exhibits.
  3. Wait for the indexing process to complete before searching.

Global Search

  1. Use the global search bar at the top of the JurisTrial home screen.
  2. Enter your term — results span cases, exhibits, and transcripts.
  3. Tap any result to jump directly to the matching item.
Screenshots · 8
How do I search for items to prepare for my case - image 1How do I search for items to prepare for my case - image 2How do I search for items to prepare for my case - image 3How do I search for items to prepare for my case - image 4How do I search for items to prepare for my case - image 5How do I search for items to prepare for my case - image 6How do I search for items to prepare for my case - image 7How do I search for items to prepare for my case - image 8

Markup

1 article
How do I mark up my data?

JurisTrial provides various marking options including highlighters, circles, arrows, and stamps. Follow these steps to mark up your data:

  1. Open a document or exhibit in JurisTrial.
  2. Tap the Markup toolbar icon (pencil icon) at the top of the screen.
  3. Choose your markup tool:
    • Highlighter — drag across text to highlight in your chosen color.
    • Circle — draw a circle around key areas of the document.
    • Arrow — drag to draw an arrow pointing to important content.
    • Stamp — select a proof stamp and tap the document to apply it.
    • Text Note — tap anywhere to add a floating text annotation.
  4. Adjust the color, size, and opacity of markups using the toolbar options.
  5. Tap anywhere outside the markup to deselect and continue reviewing.
  6. All markups are saved automatically with the document in your case.
  7. To remove a markup, tap it to select, then tap the Delete icon.
Screenshots · 8
How do I mark up my data - image 1How do I mark up my data - image 2How do I mark up my data - image 3How do I mark up my data - image 4How do I mark up my data - image 5How do I mark up my data - image 6How do I mark up my data - image 7How do I mark up my data - image 8

Project/Publish

1 article
How do I present during depositions or court proceedings?

To project during depositions or court proceedings, follow these steps:

  1. Connect your iPad to an external display using an HDMI adapter or Apple TV (AirPlay).
  2. Open JurisTrial and navigate to the case you wish to present.
  3. Tap the Present button (projector icon) in the toolbar.
  4. Select your output display from the list of available screens.
  5. The document or exhibit will appear on the external display while you retain control on your iPad.
  6. Use markup tools in real time — annotations appear live on the projected screen.

Publish Settings

  1. Tap Settings > Publish Settings within a case.
  2. Choose whether to show or hide markups on the projected screen.
  3. Set the display orientation (landscape recommended for presentations).
  4. Enable Redaction Mode if sensitive content must be hidden from the external screen.
  5. Configure audio output settings if presenting deposition videos with synchronized transcripts.

During presentations, your iPad acts as a control panel — swipe to advance exhibits, tap to apply stamps or highlights, and navigate case documents with full control while the audience sees only what you project.

JurisTrial's presentation mode is designed for depositions, mediations, and courtroom proceedings, giving you a professional, seamless experience.

Screenshots · 8
How do I present during depositions or court proceedings - image 1How do I present during depositions or court proceedings - image 2How do I present during depositions or court proceedings - image 3How do I present during depositions or court proceedings - image 4How do I present during depositions or court proceedings - image 5How do I present during depositions or court proceedings - image 6How do I present during depositions or court proceedings - image 7How do I present during depositions or court proceedings - image 8
Still stuck?

Still can't find an answer?

Our support team knows these products from the courtroom up. Tell us what you're trying to do and we'll walk you through it.